The Git Basics TL;DR
When I was in undergrad a decade ago, I heard a professor say, “git is very powerful, but most people only use about 12 commands.” Inevitably, you will end up in merge hell, or have to rebase, but that is out of scope for this piece. I’m going to attempt to cover the only git workflow you will ever need until your project gets really big or really difficult. In the commands that follow, I provide an explanation for each command so that you know what they do. Here’s some Git basics.
(This tutorial assumes you have a GitHub account and an ssh key associated with it. If you don’t have an account, get one here and follow these instructions for for generating an ssh key and adding it to your account. This is my attempt to write a guide using the essential git commands for contributing to open source, without taking away your whole day and empowering you forever.)
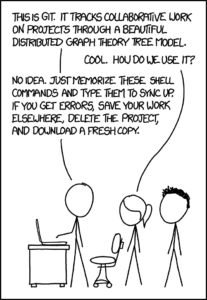
Here’s a great comic from XKCD about git.

Git Basics
Create a directory or two on your computer that makes it easy to know where you stand. I like to create a directory structure like this github.com/marcussorealheis/ so my local path resembles the one in the web.
So:
mkdir github.com

cd github.com

mkdir marcussorealheis #use your username not mine, unless you really want to!
To start, we need to grab a repo from a remote location on GitHub in this case. But before we do that, we will fork it as our own so it is all set up for working.
I like Lucene-Solr (obviously) so visit https://github.com/apache/lucene-solr. In the upper right of the page there is a fork button. Hit that fork button.
Now you are on a repo of your own, which is where you want to work if you want to contribute to someone else’s work.
To the right of the page you will see a green button that says “Clone or Download.” Click that button and copy the text it reveals that starts with git.
The text should be: git@github.com:marcussorealheis/lucene-solr.git. From here on out, the blog will be very brief, somewhat opinionated, and mostly code. Let’s dive in:
1) Clone the repo
git clone git@github.com:apache/lucene-solr.git # pulls the repo down on master branch so you can have a local copy
2) Establish the remote branch
git remote add upstream https://github.com/apache/lucene-solr.git # add the remote repo
git fetch # pull it down
^ Really two commands but you cannot do one without the other. So one step.
3) Make a branch
I like to prefix my branches with something that makes them easy to categorize like bugfix enhancement feature or hotfix if I’m fixing something affecting a release. Oftentimes, you will be starting from a release branch and not master. Some projects will require tickets be in the branch name, but I usually add those in the git UI.
git checkout -b enhancement/clarify-ago-log # creates a new copy because you should NEVER change master directly
Make your changes. (I fixed a small spacing issue in a less often used console log on the Solr admin page.)
4) Check the summary of the changes in your code so we know what we need to commit.
git status # maybe the single most helpful command for you
5) Stage your changes for commit
git add webapp/web/libs/ngtimeago.js # this stages my changes for commit
6) Commit your changes
git commit -m "fix the spacing in ngtimeago" # add a short and clear summary of your changes
7) Push your changes up
git push # actually this won't work because you need to establish an upstream branch for your changes
Copy what the terminal says and run that command:
git push --set-upstream origin enhancement/clarify-ago-log
Push again:
git push
You should see a yellow bar and a button that prompts you to compare and create a pull request. It looks like this:

Hit that button and you can review your changes in the GitHub gui. It will look like this:

You’re done. You have a basic understanding of git and can git busy with some open source projects. The five other commands that are helpful to know (since we had to --set-upstream) would be:
1) git init # creates a .git/ dir in your project folder to initialize version control
2) git reset -- HEAD # overwrite all your local changes to reset to the remote repo
3) git remote -v # allows you to check that your remote repo is correctly set as your origin and the original repo is upstream
If you need to fix that ever, look here: https://git-scm.com/book/en/v2/Git-Basics-Working-with-Remotes
4) git merge upstream/master # if your local copy got behind and you want to sync changes from upstream
5) git stash # you made some local changes that you rather set aside, to keep moving. If you might need the code later, keep the stash ID in a handy place.
There’s actually a lot more to
git
than what is encompassed in this post, but it is a start. If you need more help, let me know.
Bonus pro tip: If you want to know what branch you are on, you use iTerm2, and you work on Mac OSX, add this to your ~/.bashrc:
function iterm2_print_user_vars() {
iterm2_set_user_var gitStatus "$(gitStatus)"
}
Learn More
- Read more technical tips and tricks
- Contact us, we’d love to hear from you!
LEARN MORE
Contact us today to learn how Lucidworks can help your team create powerful search and discovery applications for your customers and employees.