Secure Fusion: Authentication and Authorization

This is the second in a series of articles on securing your data in Lucidworks Fusion. Here’s Part One.
This post covers Fusion’s basic application-level security mechanisms. At the application layer, Fusions delivers security via:
- Authentication – users must sign on using a username and password.
- Authorization – each username is associated with one or more permissions which specify the Fusion REST-API requests they have access to. Permissions can be restricted to specific endpoints and path parameters.
Fusion stores this information in Apache ZooKeeper, (heeding the advice in this post on how and why to use ZooKeeper). ZooKeeper keeps this information secure and always available to all Fusion components across the deployment.
Users and Realms
A realm in a Java EE application is a complete database of users and groups which are controlled by the same kind of authentication. A realm is specified as part of an HTTP request during basic authentication. In Fusion, this information is encapsulated by a Security Realm, defined by a unique ID, realm name, and the type of the authentication handling mechanism.
Fusion can be configured for the following realm types:
- Native – Fusion manages all authentication and permissions information directly. Fusion user accounts are created and managed either using the Fusion UI or the REST-API. The entire user database is stored in ZooKeeper. Stored passwords are encrypted using bcrypt, the strongest possible encryption algorithm available to all JDKs. The native realm is the home of the Fusion admin user and is the default realm type.
- LDAP – Fusion stores a local user record in ZooKeeper, and authentication is performed by the LDAP server. The Fusion user id maps directly to the LDAP Distinguished Name (DN).
- Kerberos – Fusion stores a local user record in ZooKeeper and a mapping to the Kerberos principal. SPNEGO is used for authentication via Kerberos.
This post only covers authentication and user management in Fusion’s native security realm. Upcoming posts will cover LDAP and Kerberos security realms.
Authentication: Members Only
Fusion logins require a username, password, and authentication realm. Usernames are unique within a realm. Fusion creates a globally unique user ID for all users based on the combination of username and realm.
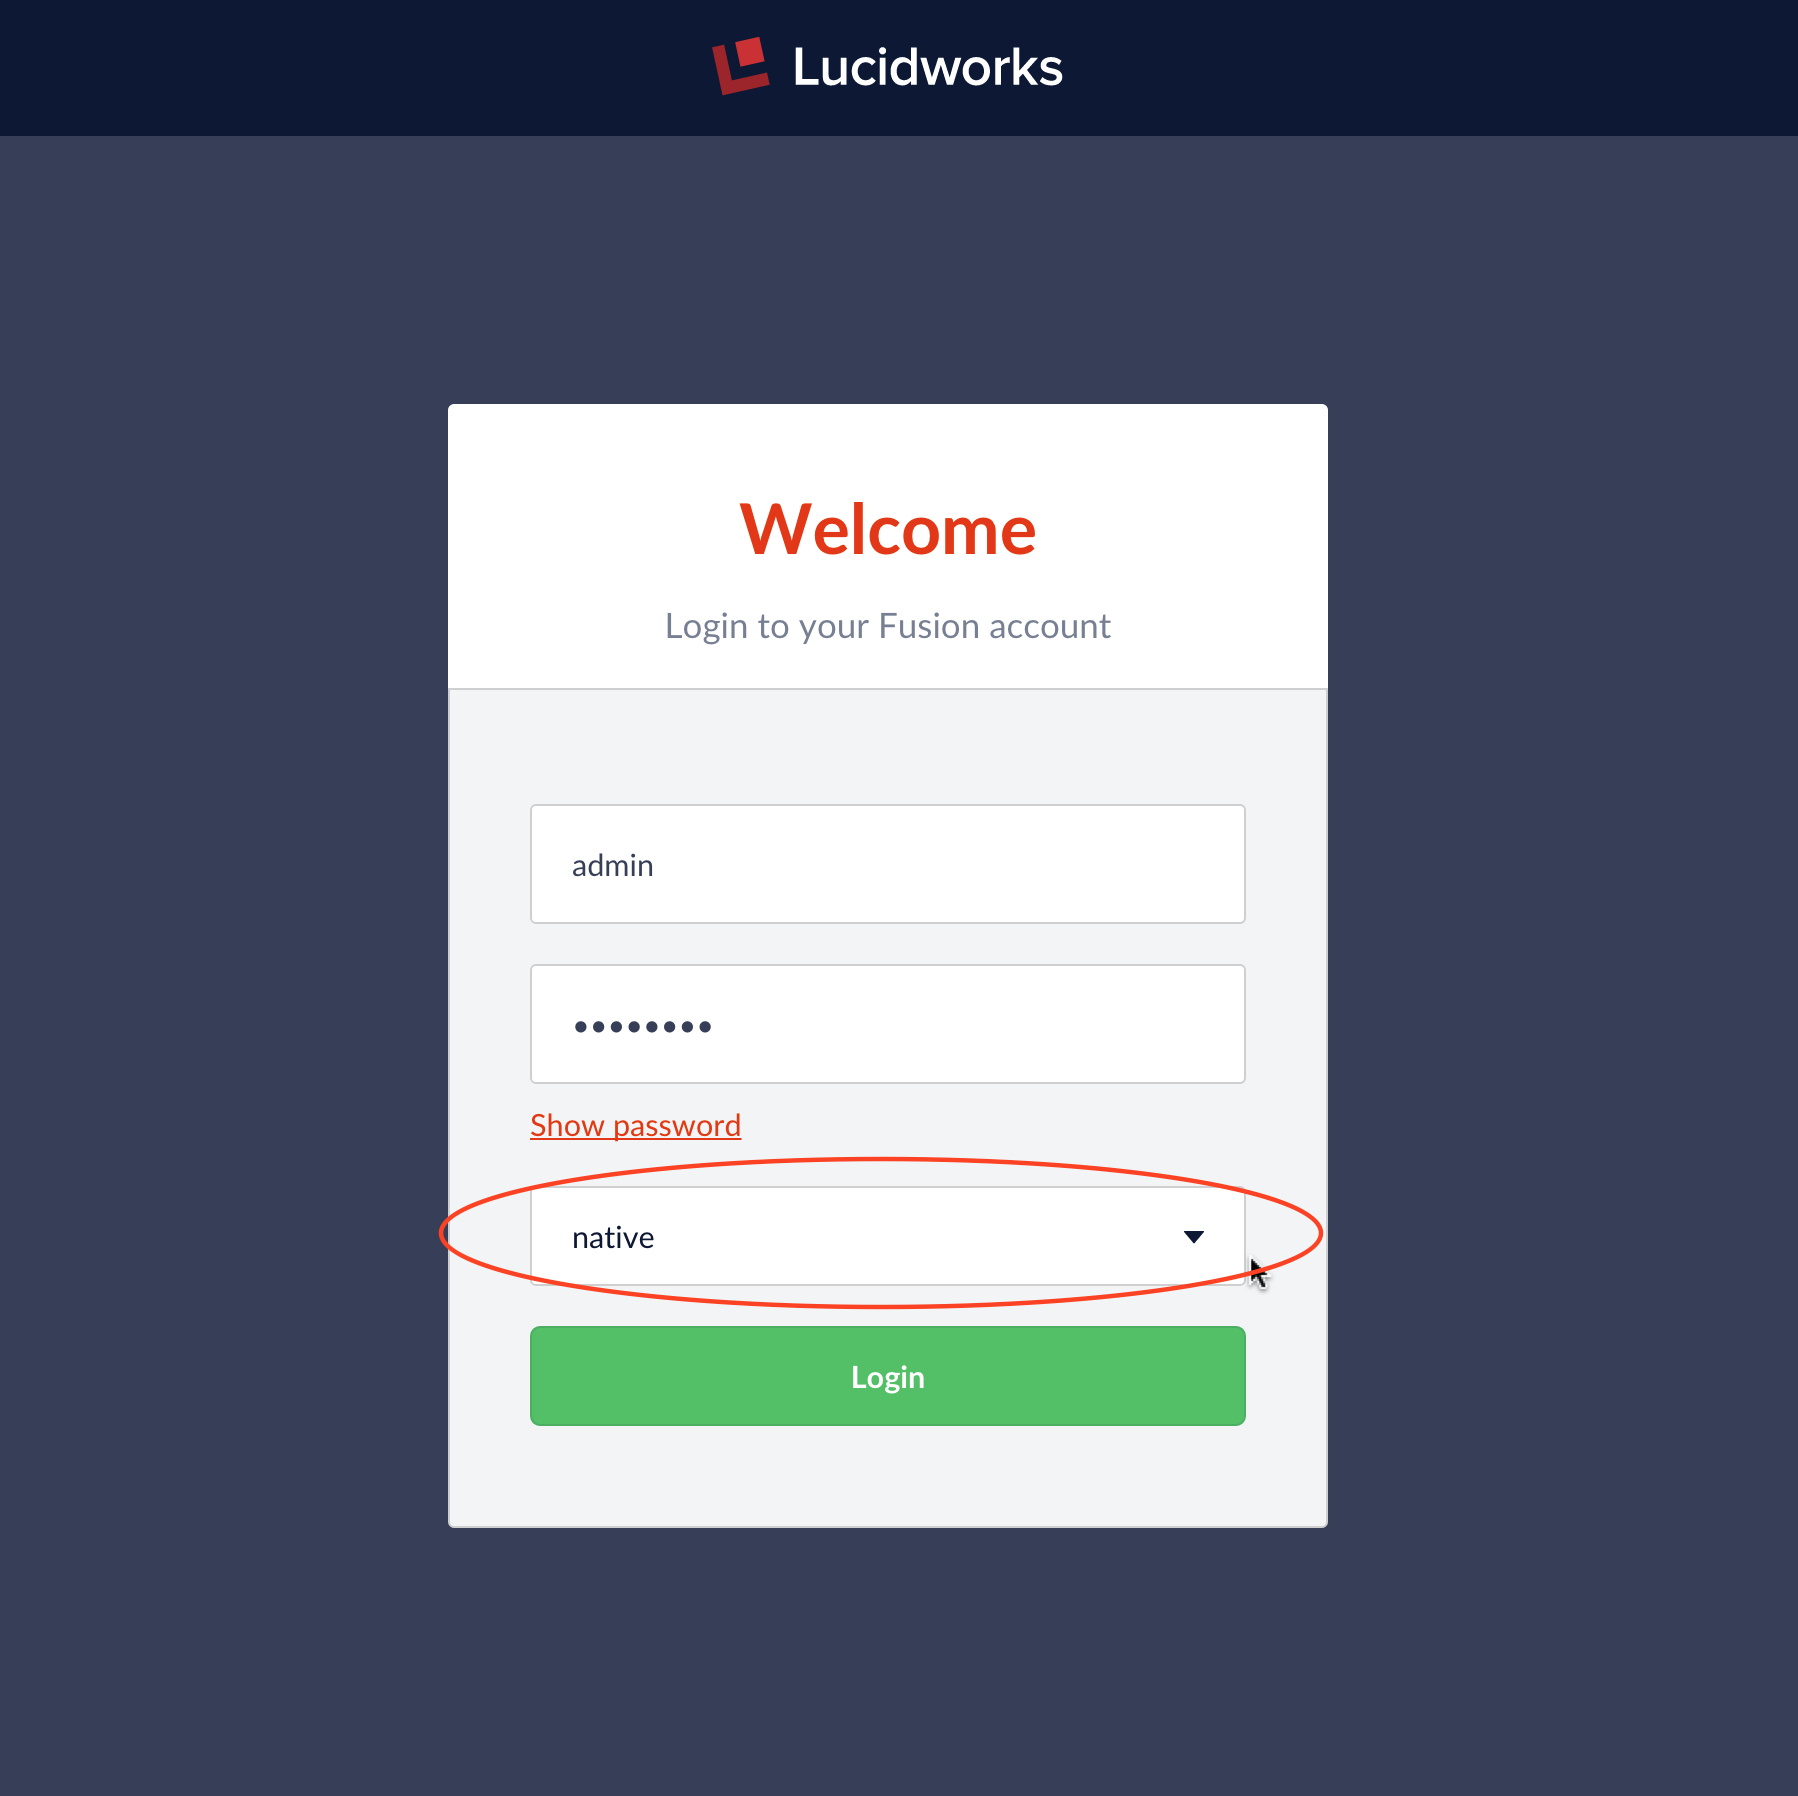
In the Fusion UI, the login screen provides a pulldown menu for all configured security realms. If no other security realms have been configured, the only choice is the “native” realm.
The system administrator account belongs to the Fusion native realm. On initial startup, the first UI panel displayed is the “set admin password” panel:
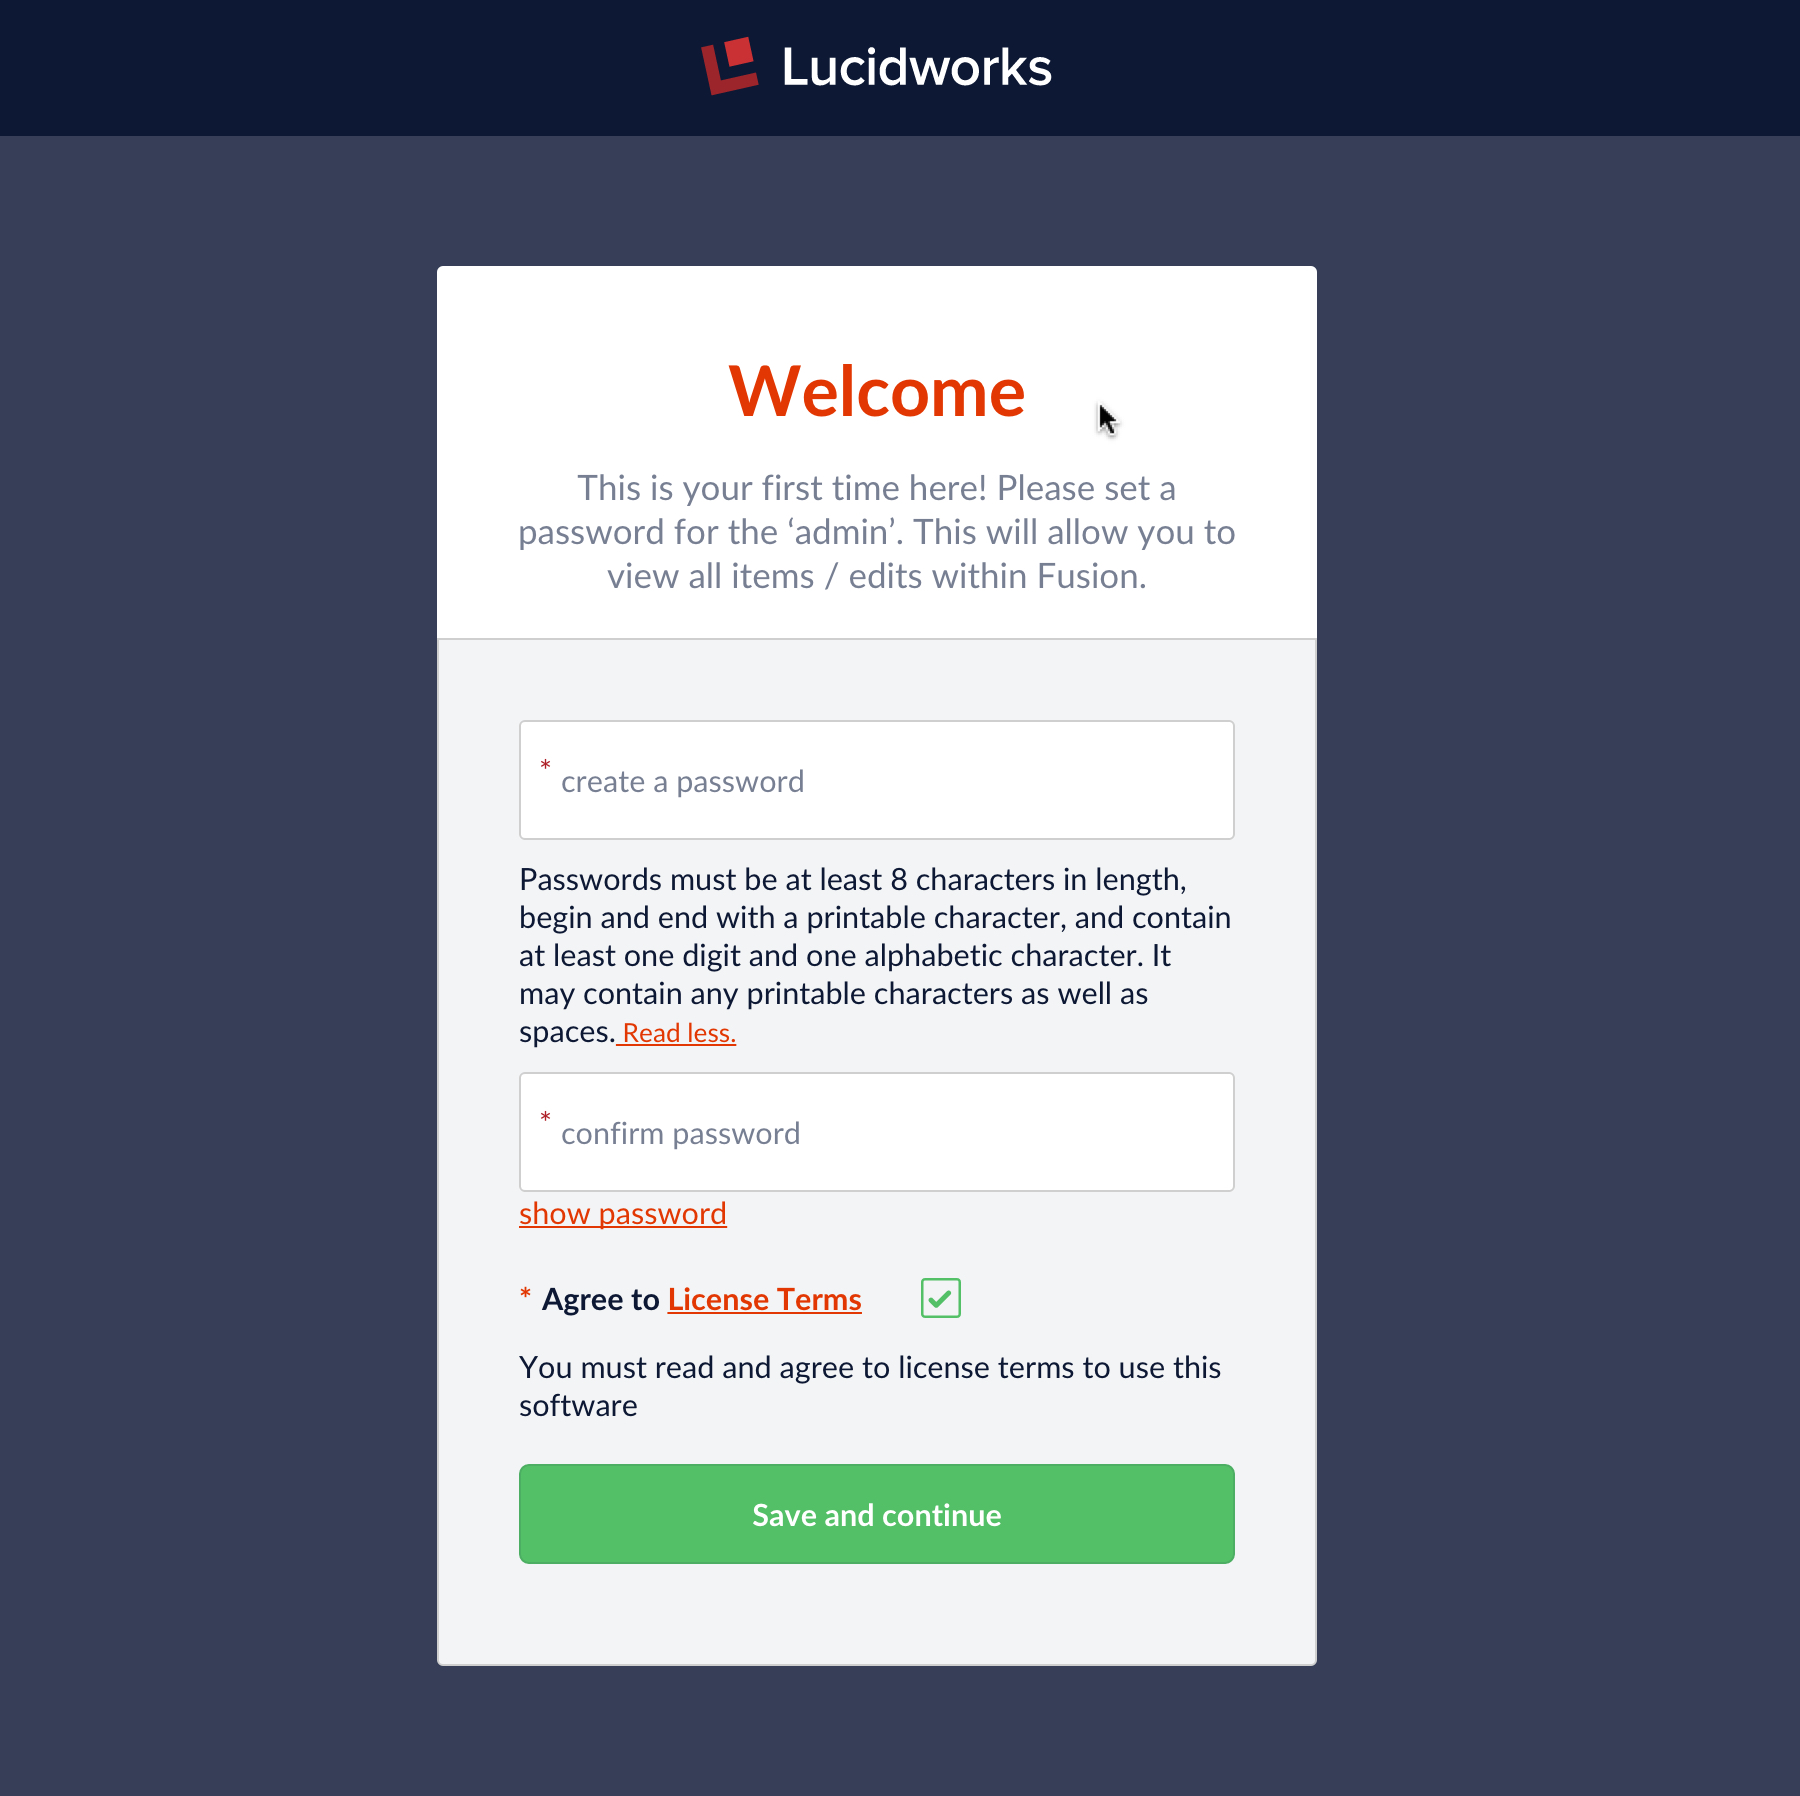
You must fire up the Fusion UI to set the admin user password in order to get started with Fusion. Setting the password creates the account, otherwise you have a system with no user accounts in it, which makes it impossible to create a properly authorized request: no authorization, no service.
Once the password has been validated, Fusion registers the “admin” account in ZooKeeper. The admin user has all system privileges; when logged in as admin you have access to all data and configuration information. This is sometimes convenient for preliminary development on an isolated machine, but in a production environment, there should be least as many user accounts as there are different types of users.
If your search application requires search over a collection with document-level security via ACLs, then you need to create a user account for all the users who can access those documents. This can be done in conjunction with LDAP or by creating Fusion users in the native realm directly. For the latter situation you must make sure that: the user names match up with the ACLs on the documents; and the datasource used for indexing is configured to index the ACLs along with the document contents. If you don’t have document-level security, then you would only need to define as many user accounts as you have user types.
Authorization via Roles and Permissions: To Each According to Their Needs
Fusion permissions specify access to the Fusion REST-API endpoints. Whenever a user makes a request, Fusion’s authorization mechanism uses the unique user id to get the user permissions from the appropriate realm.
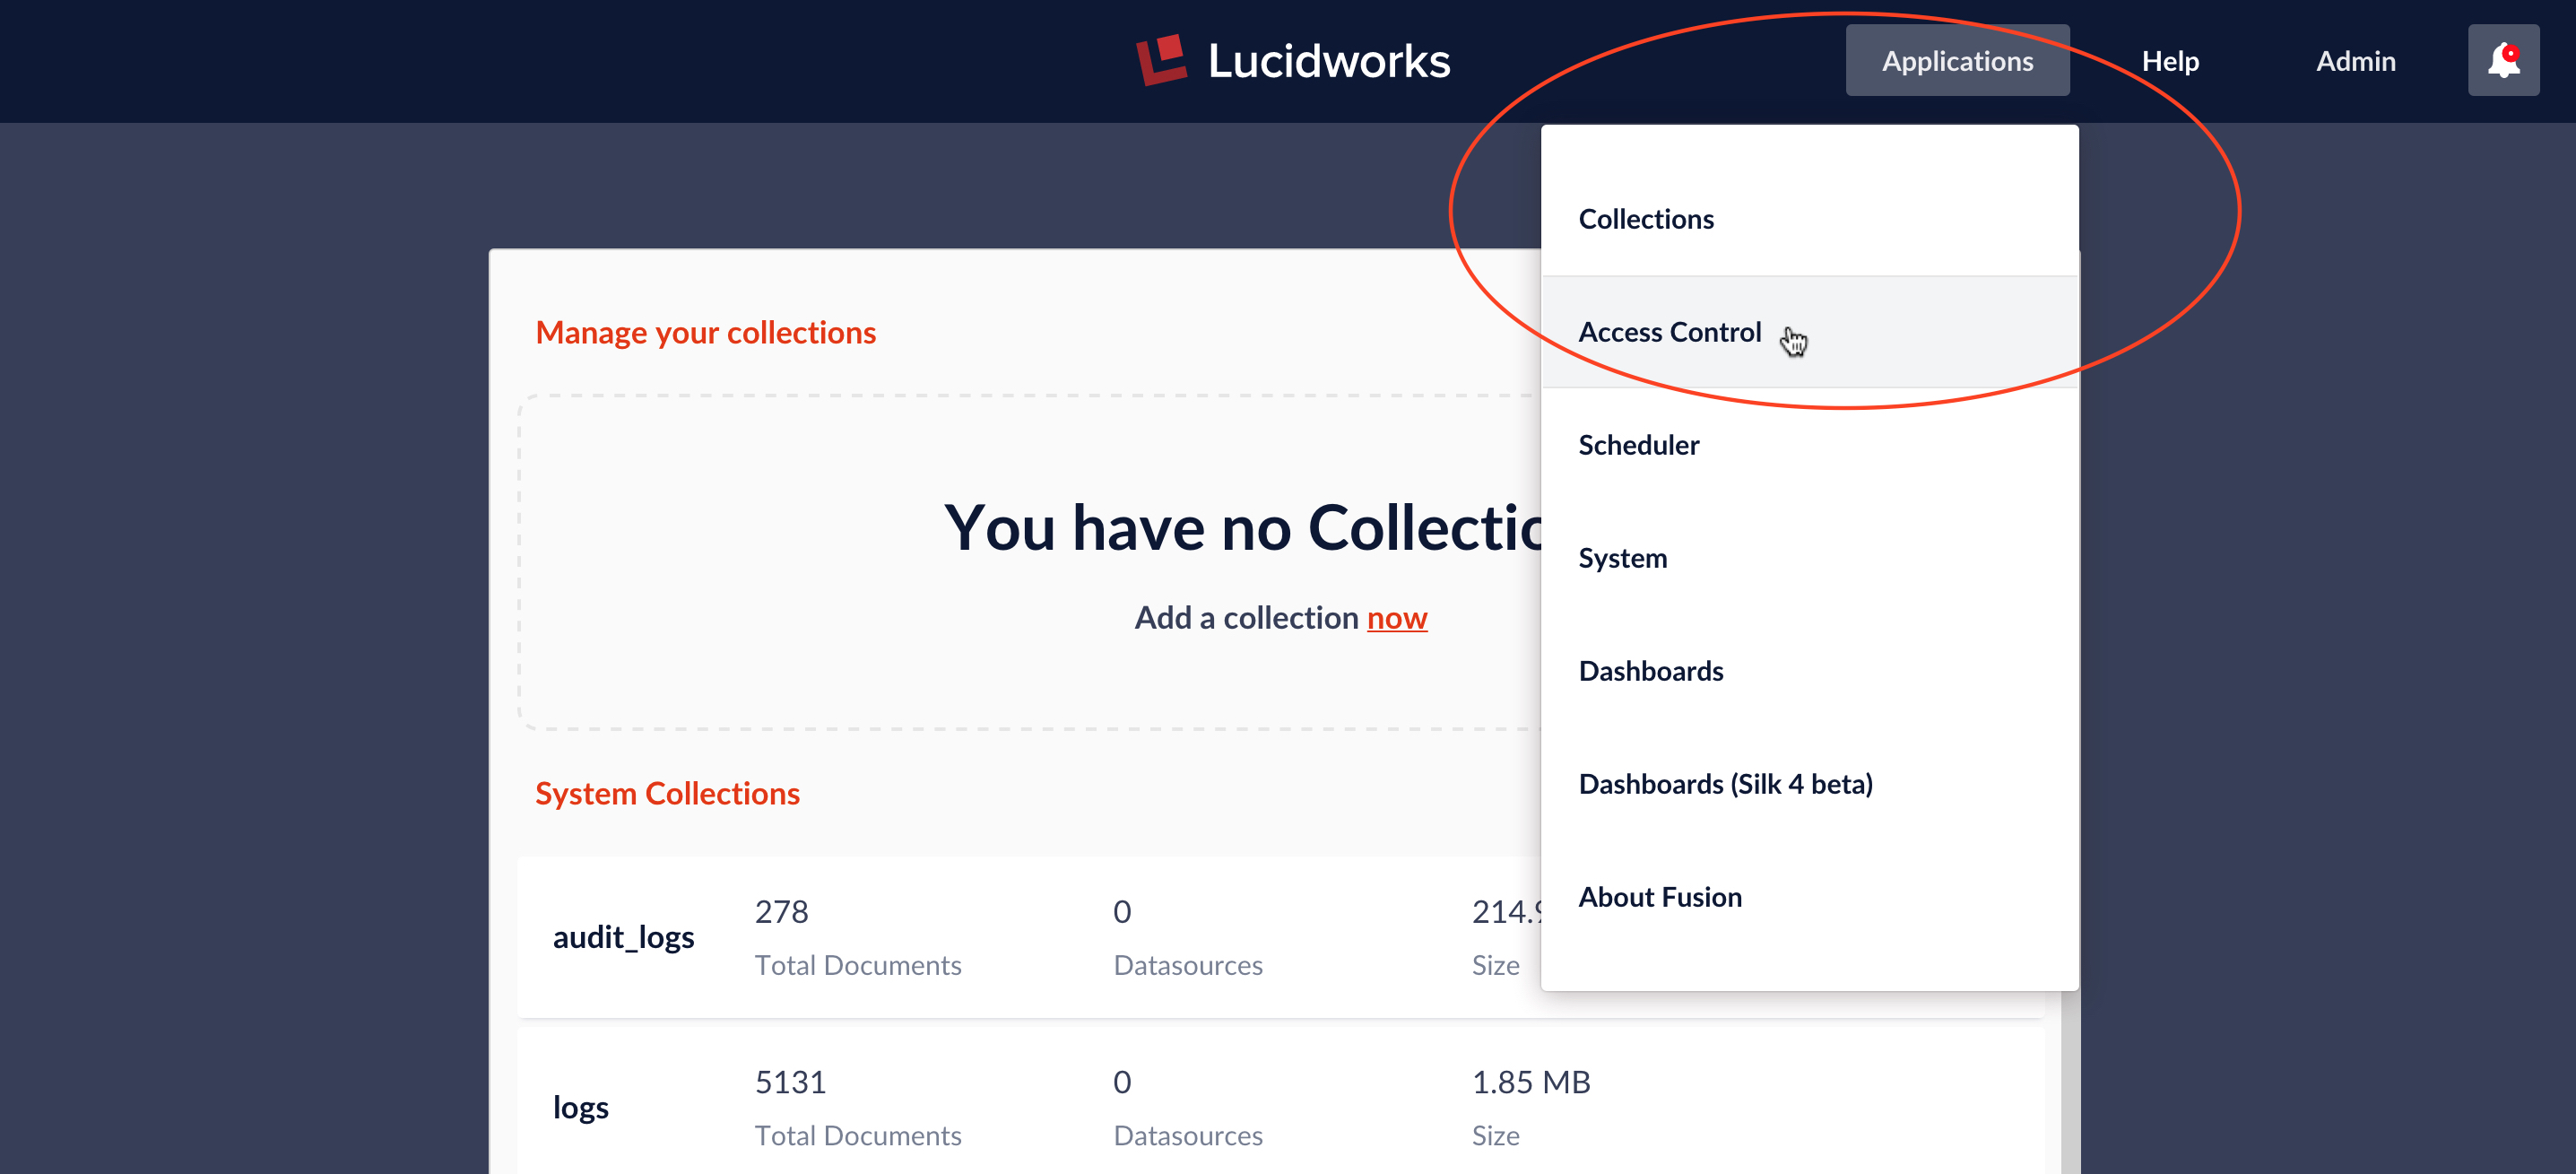
The Fusion REST-API service User is used to create and manage user permissions. A user with full permissions for the User service can create and manage user accounts. To bootstrap this process, Fusion creates the admin user at initial startup. To manage user accounts from the Fusion UI, from the top-menu bar “Applications” pulldown menu choose entry “Access Control”:
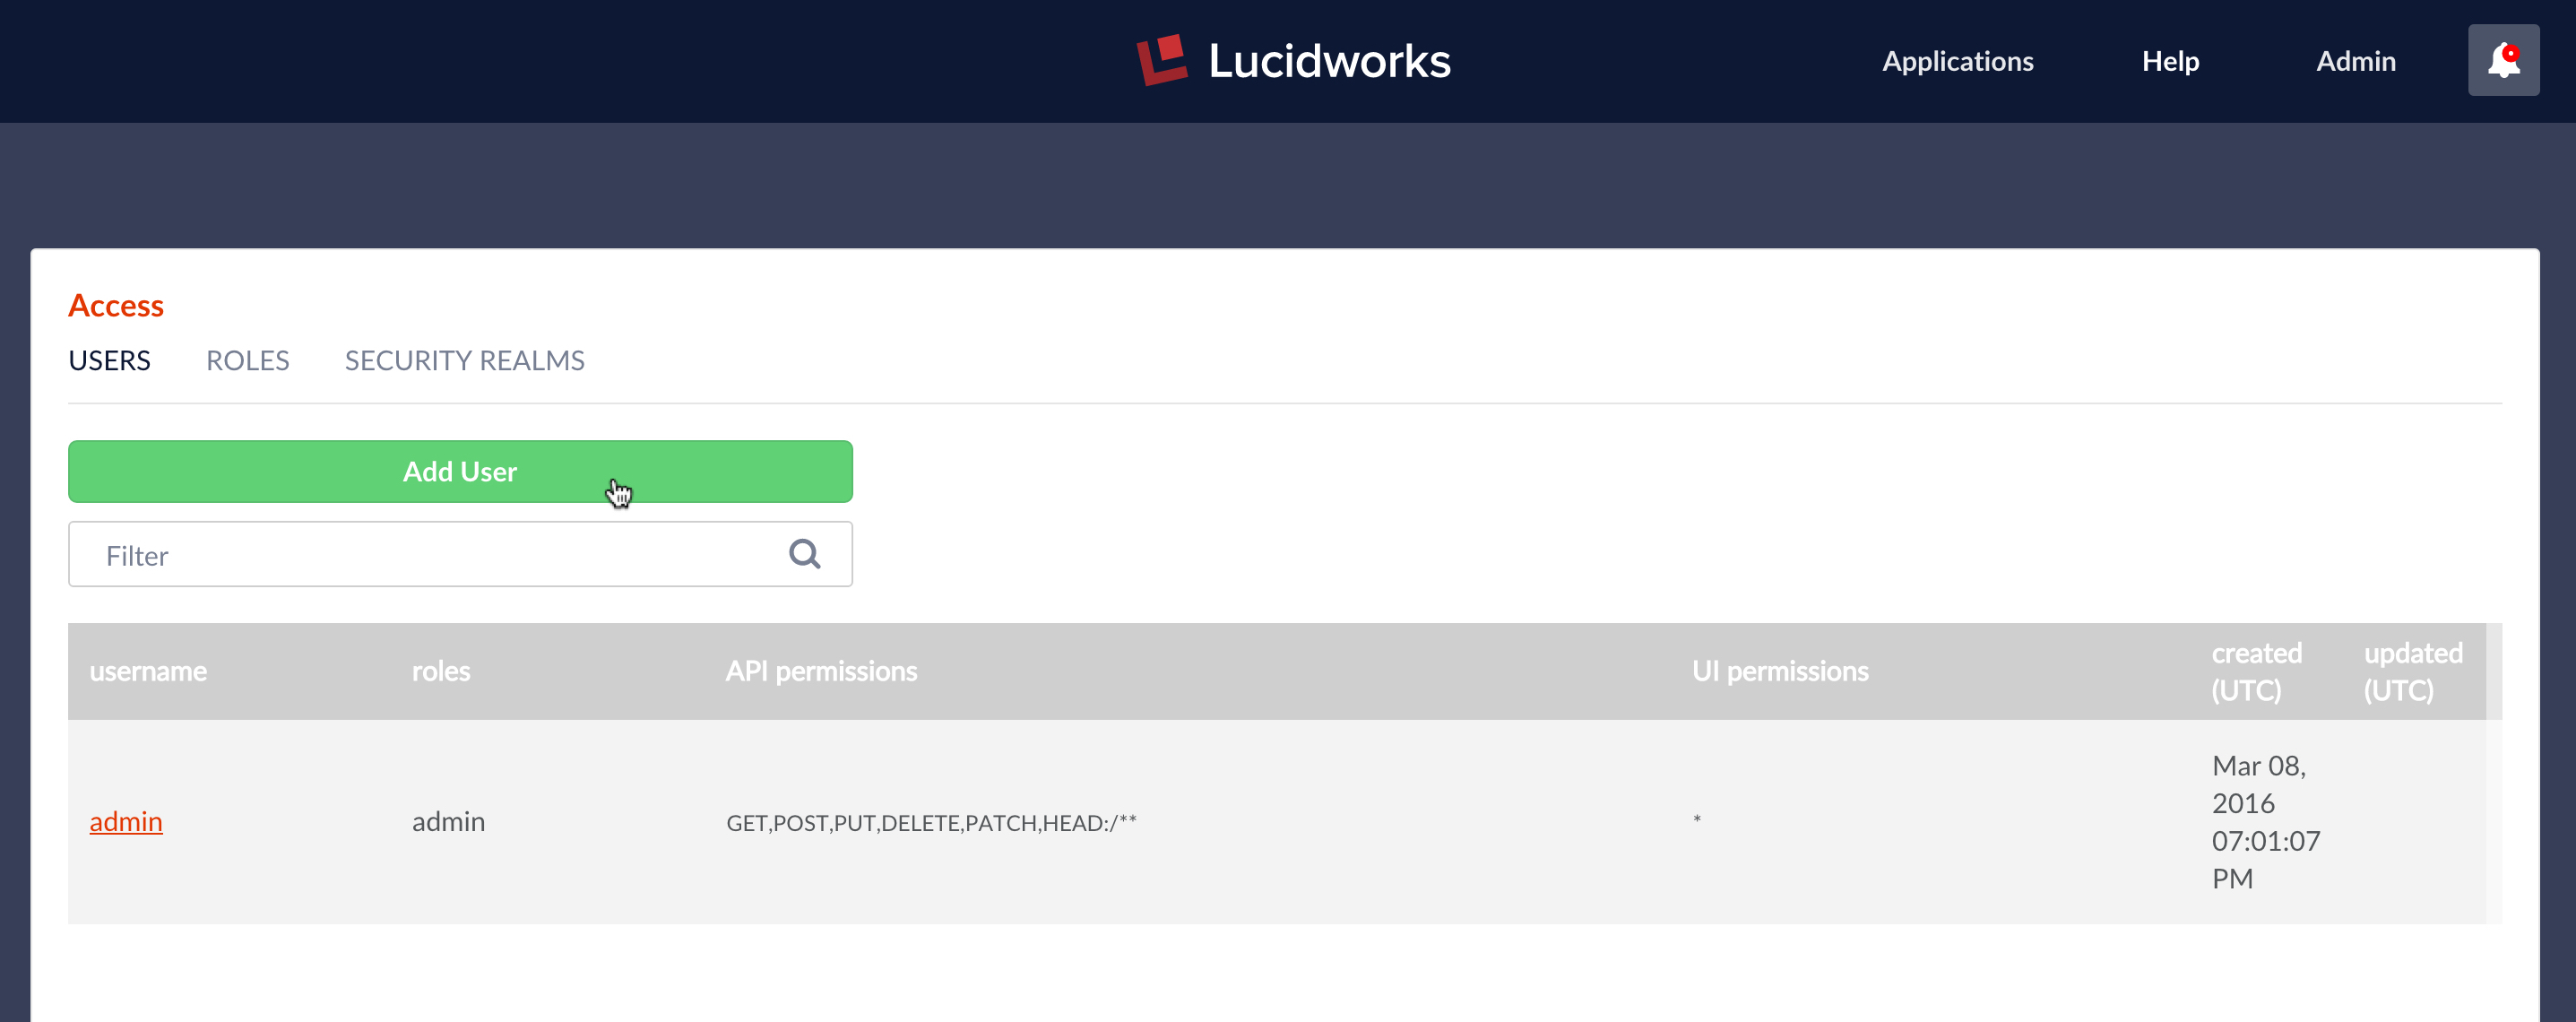
The Access panel has three subpanels: “USERS”, “ROLES”, and “SECURITY REALMS”. User accounts are created via the “USERS” subpanel “Add User” button:
The following information is required in order to create a new user account: username, realm, and password. All other information is optional, however, unless a user has one or more permissions, they cannot do anything at all in Fusion.
A permissions specification consists of two or three pieces of information:
- HTTP request methods allowed.
- REST-API services path, which can contain wildcards or named variables. All calls to the REST-API start with “api/apollo”, followed by the service name and any methods and parameters. The permissions specification includes everything following “api/apollo”.
- Allowed values for any named variables in the path.
Permissions specifications are coded up as a string using the colon character “:” as the separator between the permission elements:
- The methods specification lists the allowed HTTP method or methods, separated by commas.
- The endpoint can include wildcards. The wildcard symbol ‘*’ matches all possible values for a single path fragment and two wildcards match all possible values for any number of path fragments. A path fragment can be a named variable enclosed in curly braces: “{variable-name}”. Variables are used when a wildcard would be too permissive and a single path fragment too restrictive.
- The variable specification component specifies the restricted value or values for all named variables in the path. Each specification consists of the variable name, followed by “=” (the equals sign), followed by one or more values which are separated by commas. If the endpoint specification has multiple variable, the semi-colon character “;” is used as the separator between parameter specifications.
The following are examples of permission specifications and what they do:
GET:/query-pipelines/*/collections/*/select– search access to any Fusion collection.GET,PUT:/collections/Collection345/synonyms/**– permission to edit synonyms for collection named “Collection345”.GET:/collections/{id}:id=Collection345,Collection346– read access to collections named “Collection345” and “Collection346”.
Wildcards make it easy to give wide access to Fusion services. The permissions for the admin user can be written in a single line:
GET,POST,PUT,DELETE,PATCH,HEAD:/**
Restricting access to a subset of Fusion’s functionality requires a list of narrowly defined permissions. In order to facilitate this process, Fusion provides “Roles” which are named sets of permissions. These are managed via “ROLES” panel of the “Access” controls:
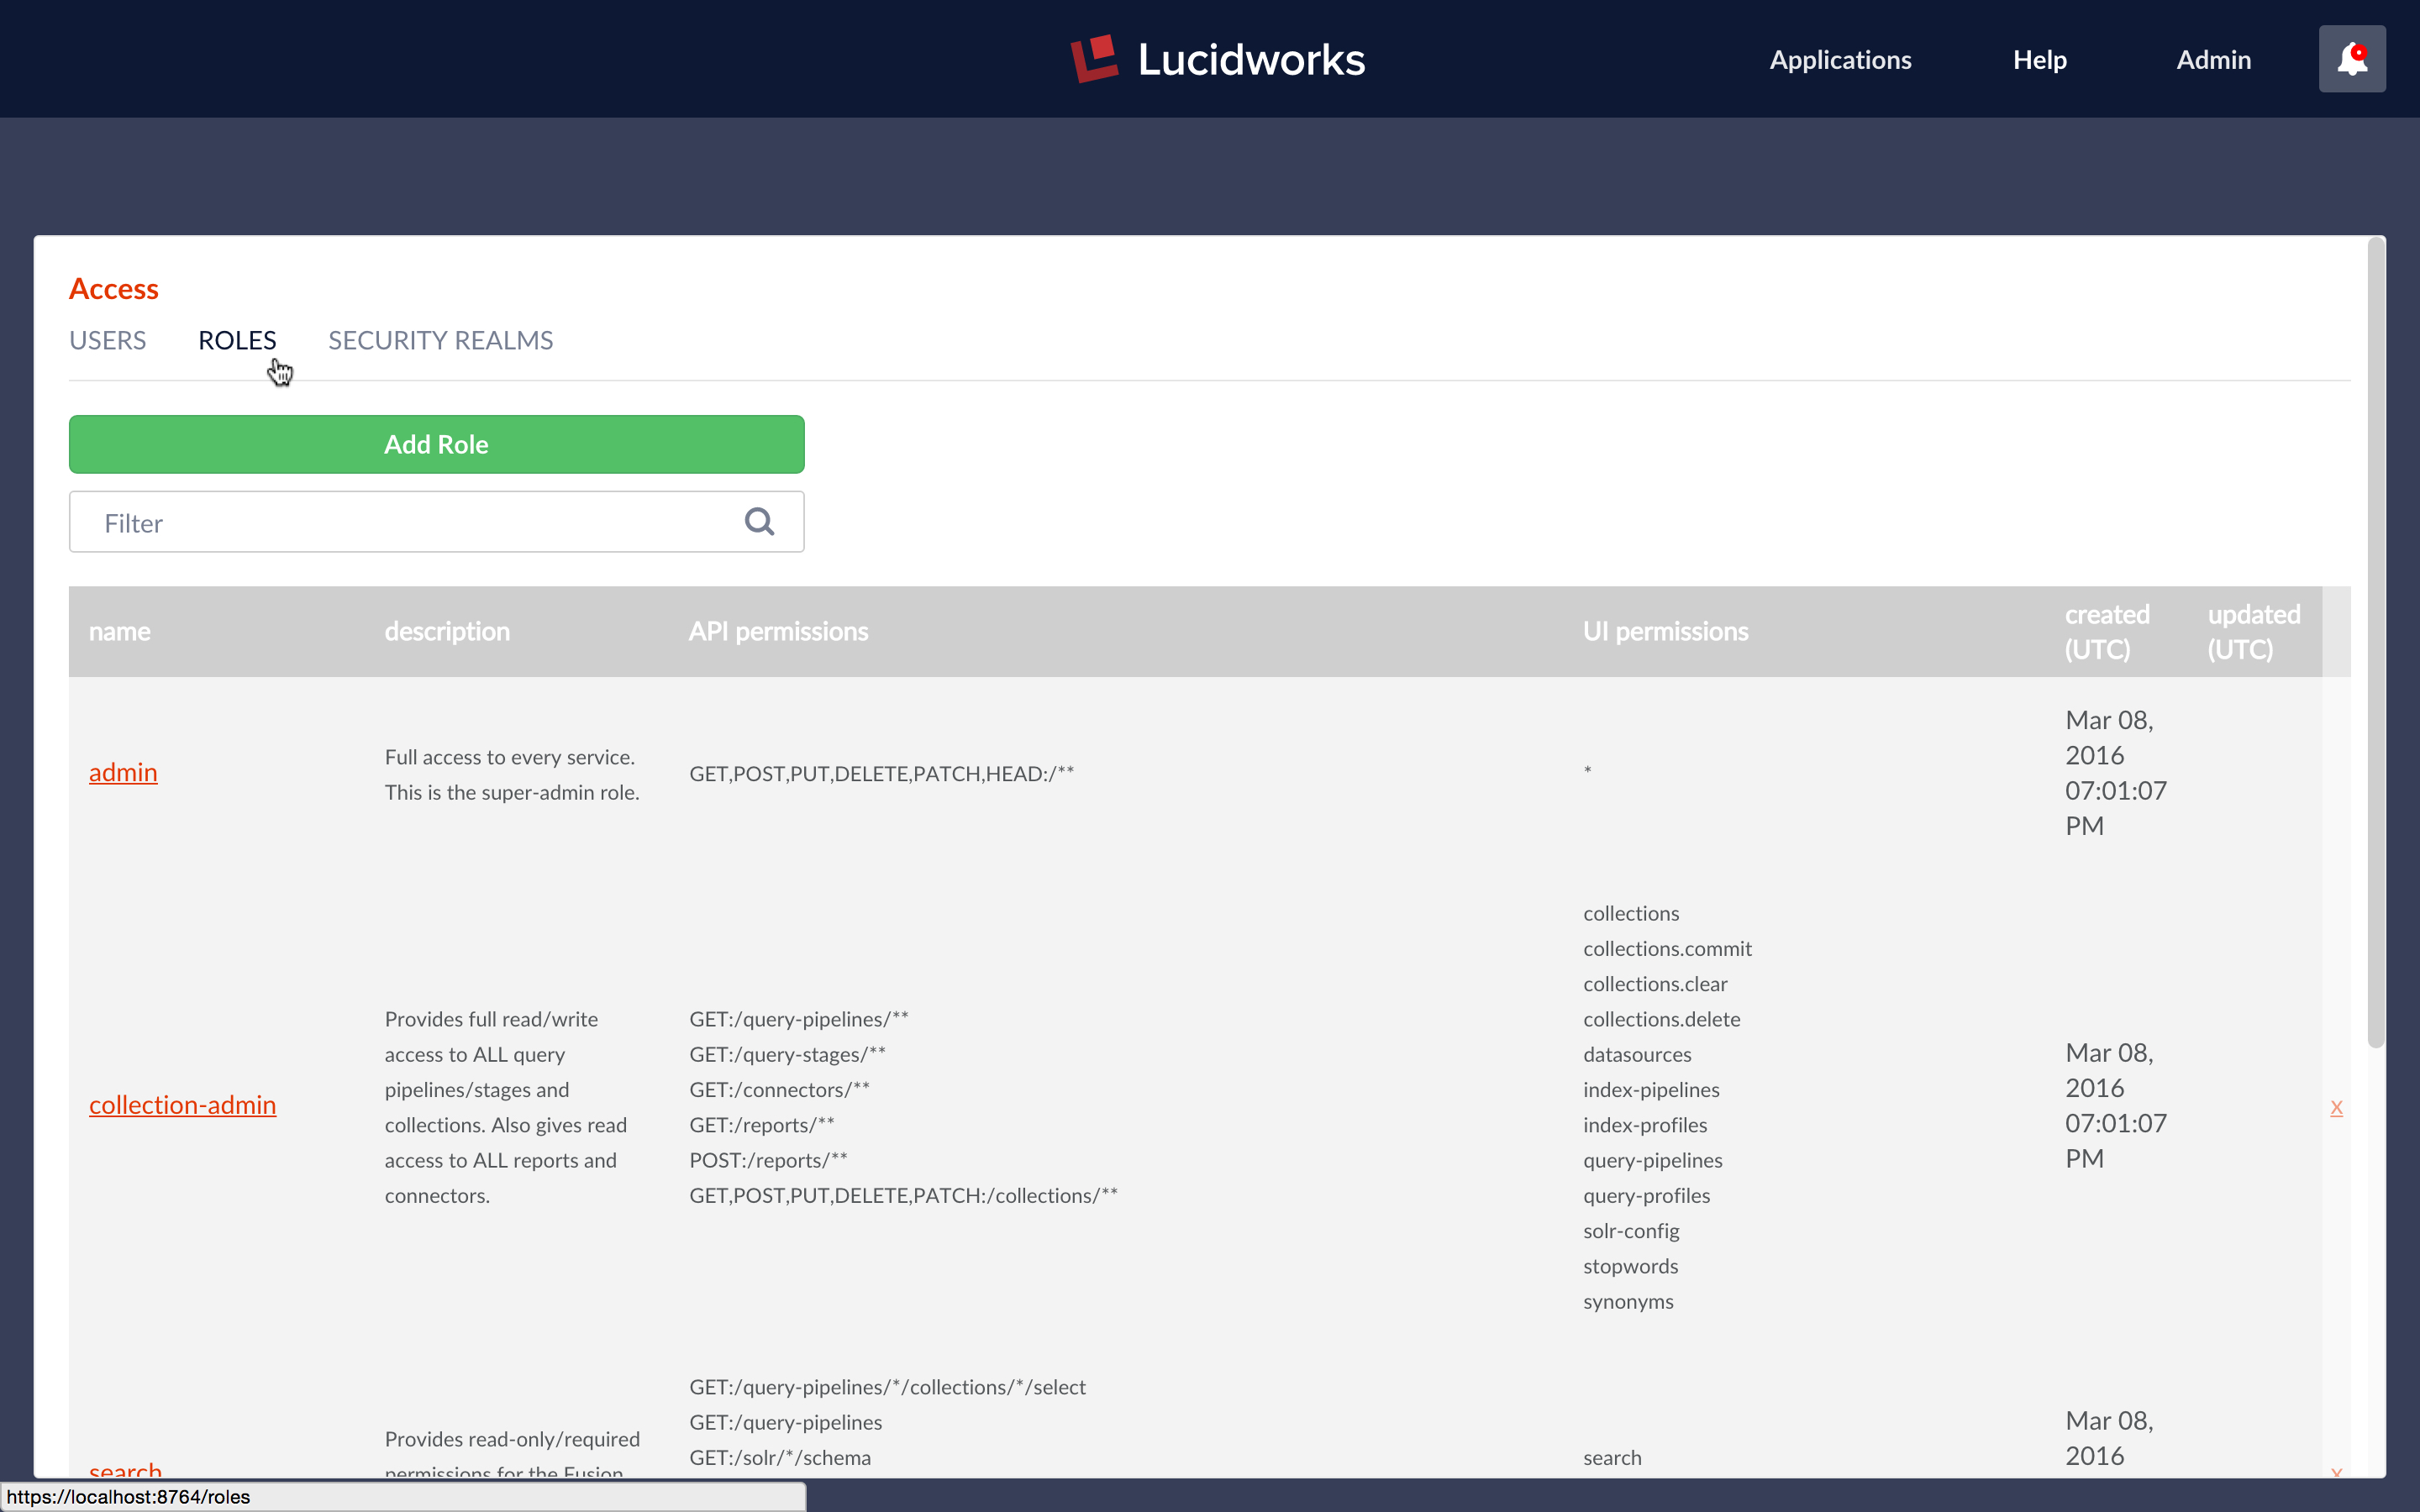
At initial startup, Fusion creates the following named roles:
- admin – superuser role – access to everything, permissions specification above.
- collection-admin – read/write access to all query pipelines/stages and collections and read access to all reports and connectors.
- search – read-only access to collections and permissions needed to access the Fusion Search UI.
- ui-user – access to the Fusion UI for information only, also allows user to change their password.
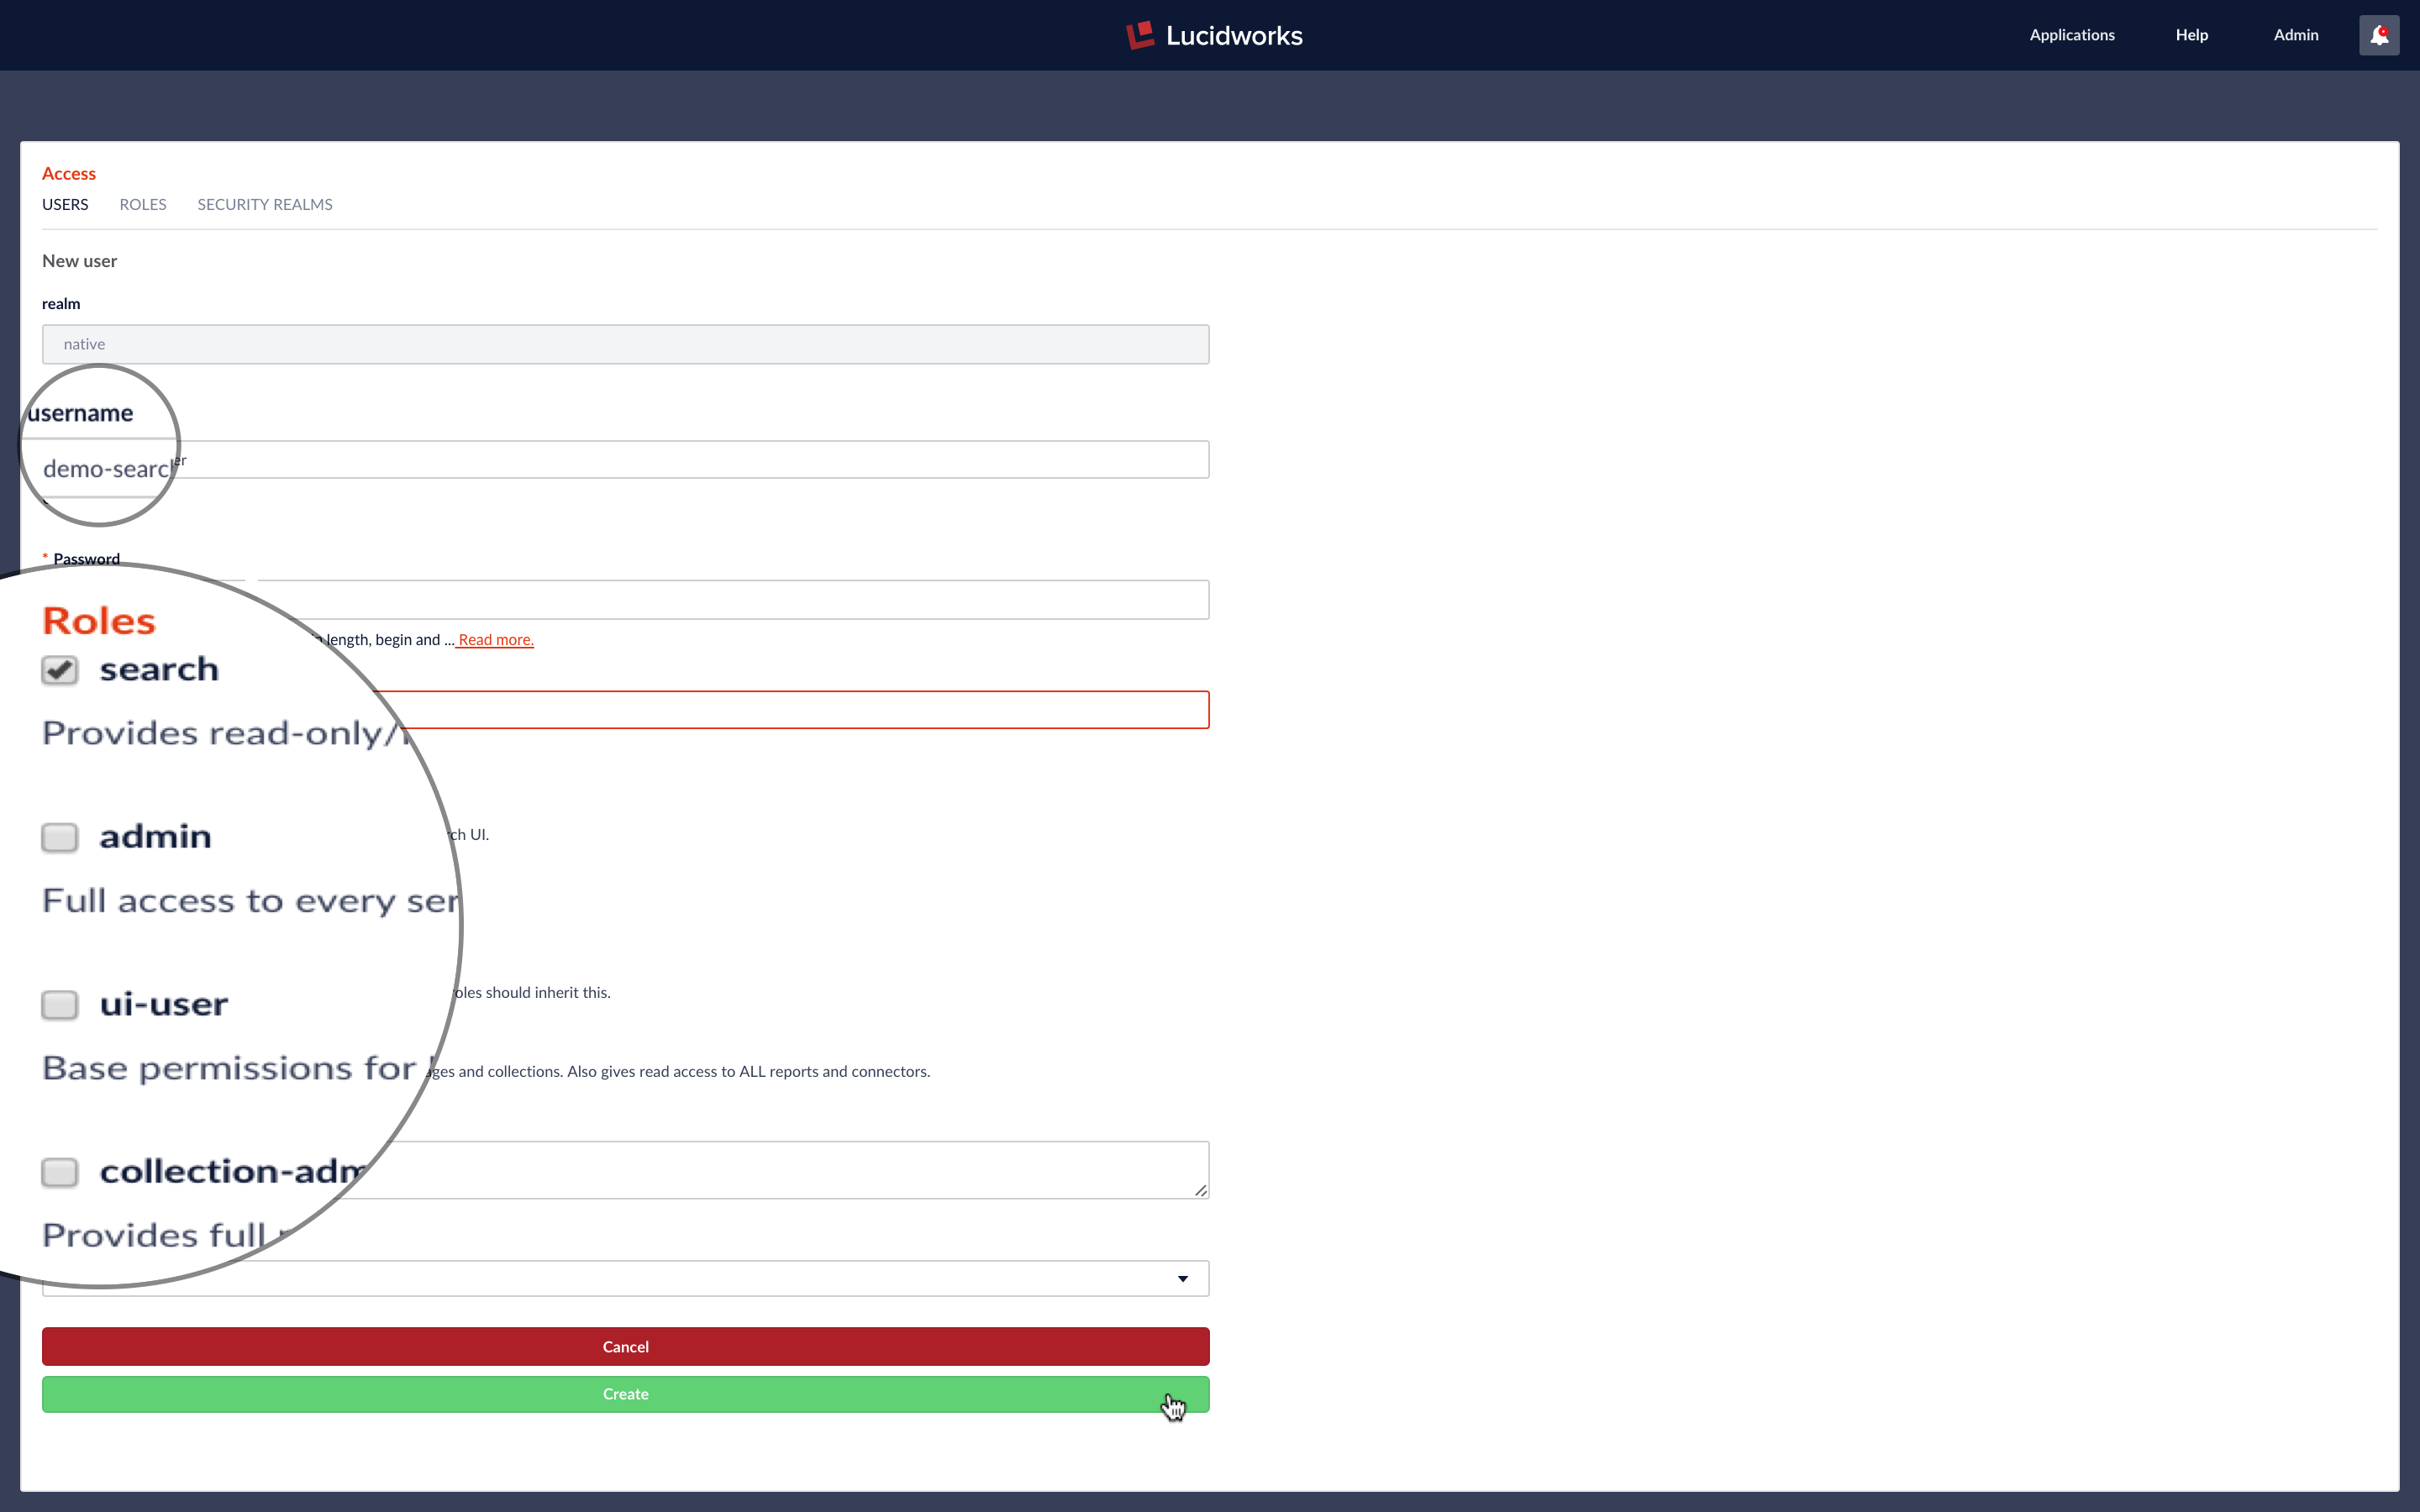
To see how different permissions work, while logged in a the admin user, I create a new user with username “demo-search-user” and with permissions for the “search” role:
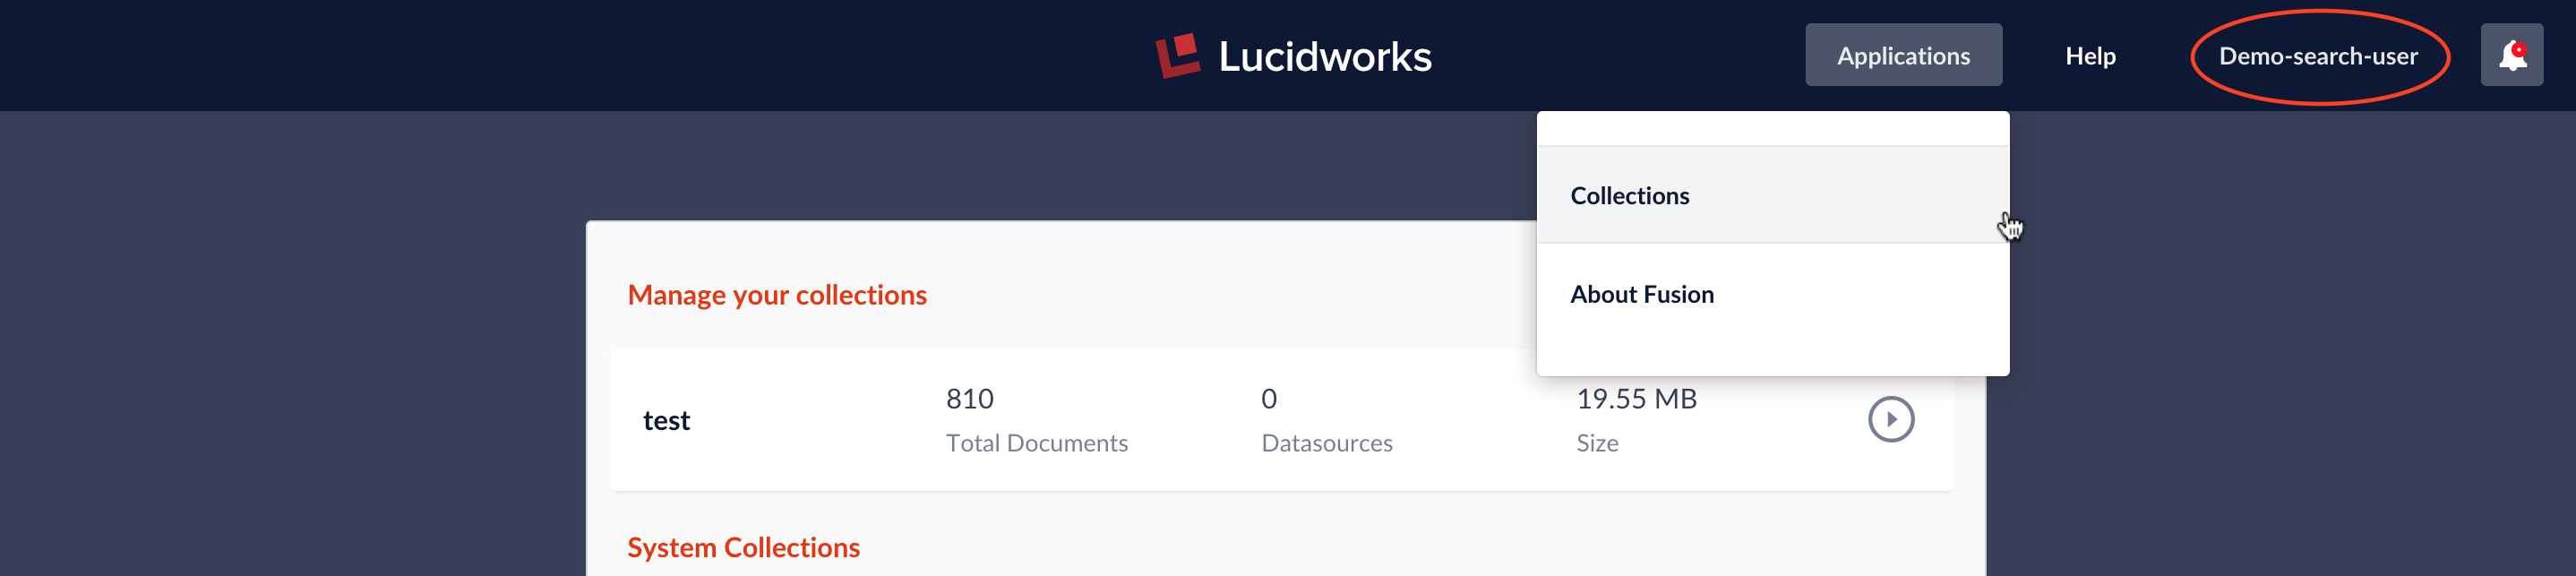
Next I logout as admin and log in a “demo-search-user”. When logged in “demo-search-user”, the only choice on the “Applications” menu is “collections”. When viewing a collection, the “Home” menu contains no options; the only thing this user can do is run searches from the Search panel.
The search user can run searches, but there is no available role for a data-analyst user who wants to use Fusion’s dashboards. To show how to create a very limited set of permissions for a specific user, I’ll define a role named “dashboards-collection-test” which allows a user to access Fusion dashboard for a collection named “test”. The permissions are:
GET:/solr/{id}/*:id=test– read-only access to collection named “test”GET:/solr/{id}/admin/luke:id=test– also read-only accessGET:/solr/system_banana/*– read-only access to dashboardsGET:/collections/system_banana– read-only access to collection where dashboard definitions are stored
From the “ROLES” panel, I create the role “dashboards-collection-test” with the above permissions:

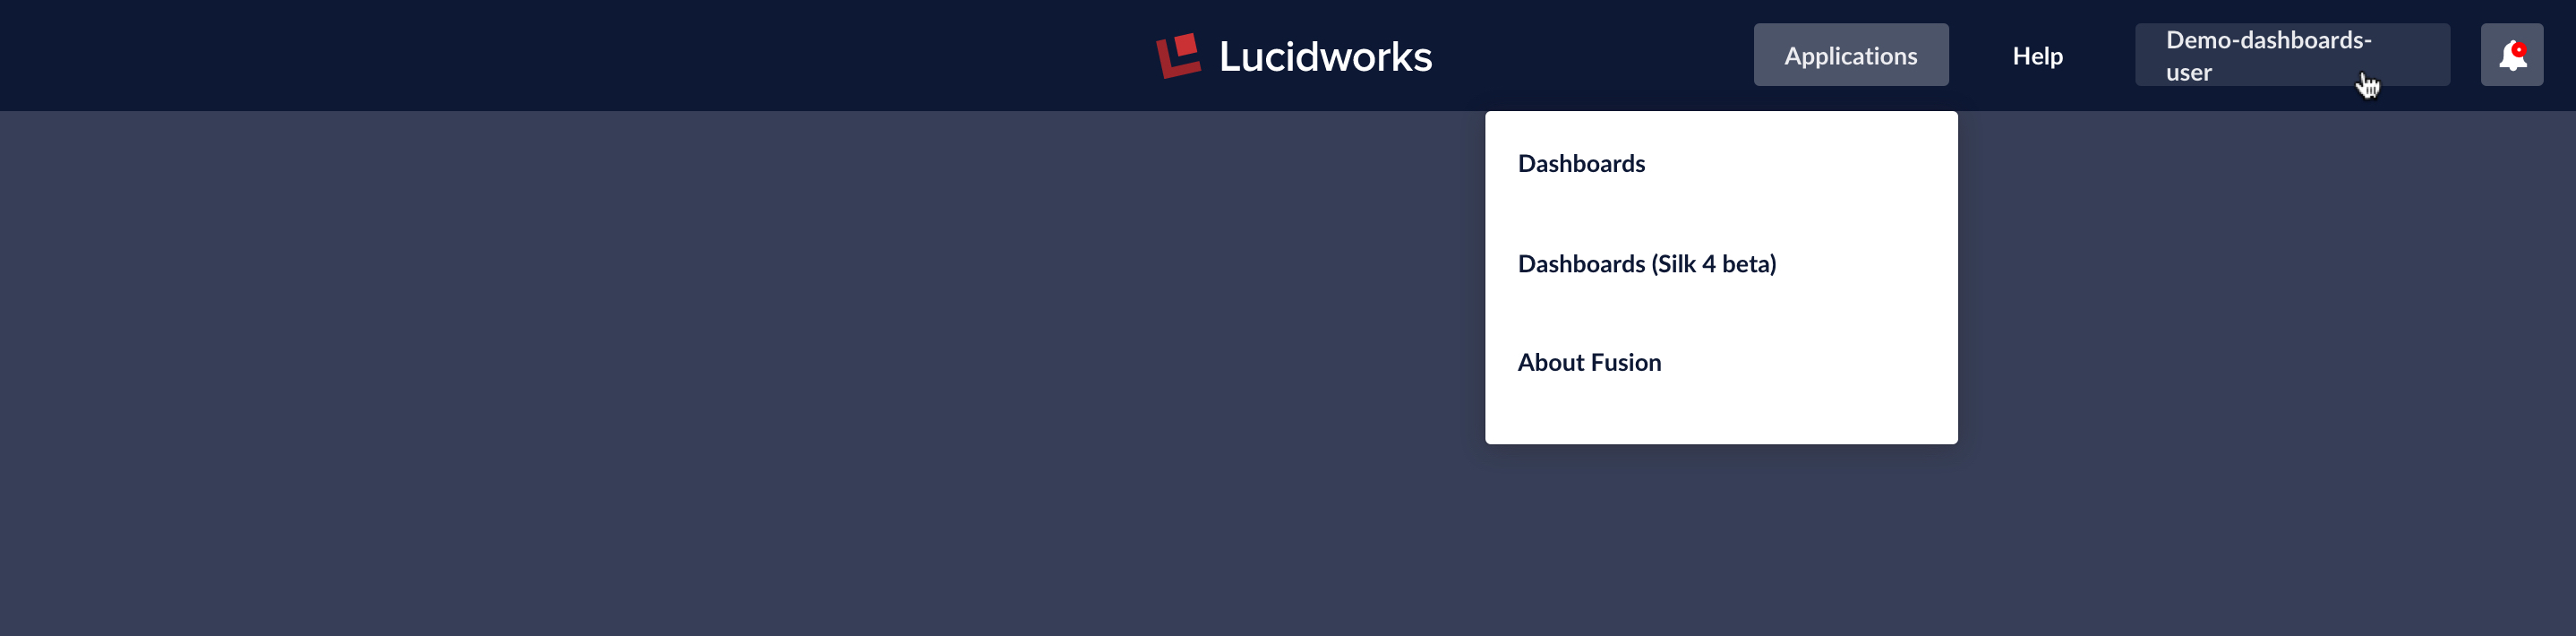
Next I create a user named “demo-dashboard-user”. This user has role “dashboards-collection-test” and also has access to the UI dashboards and no other roles or UI access. When logged in a “demo-dashboard-user”, main UI panel is blank and the only choice on the application menu is “dashboards”.
I can create a non-timeseries dashboard over collection “test”:
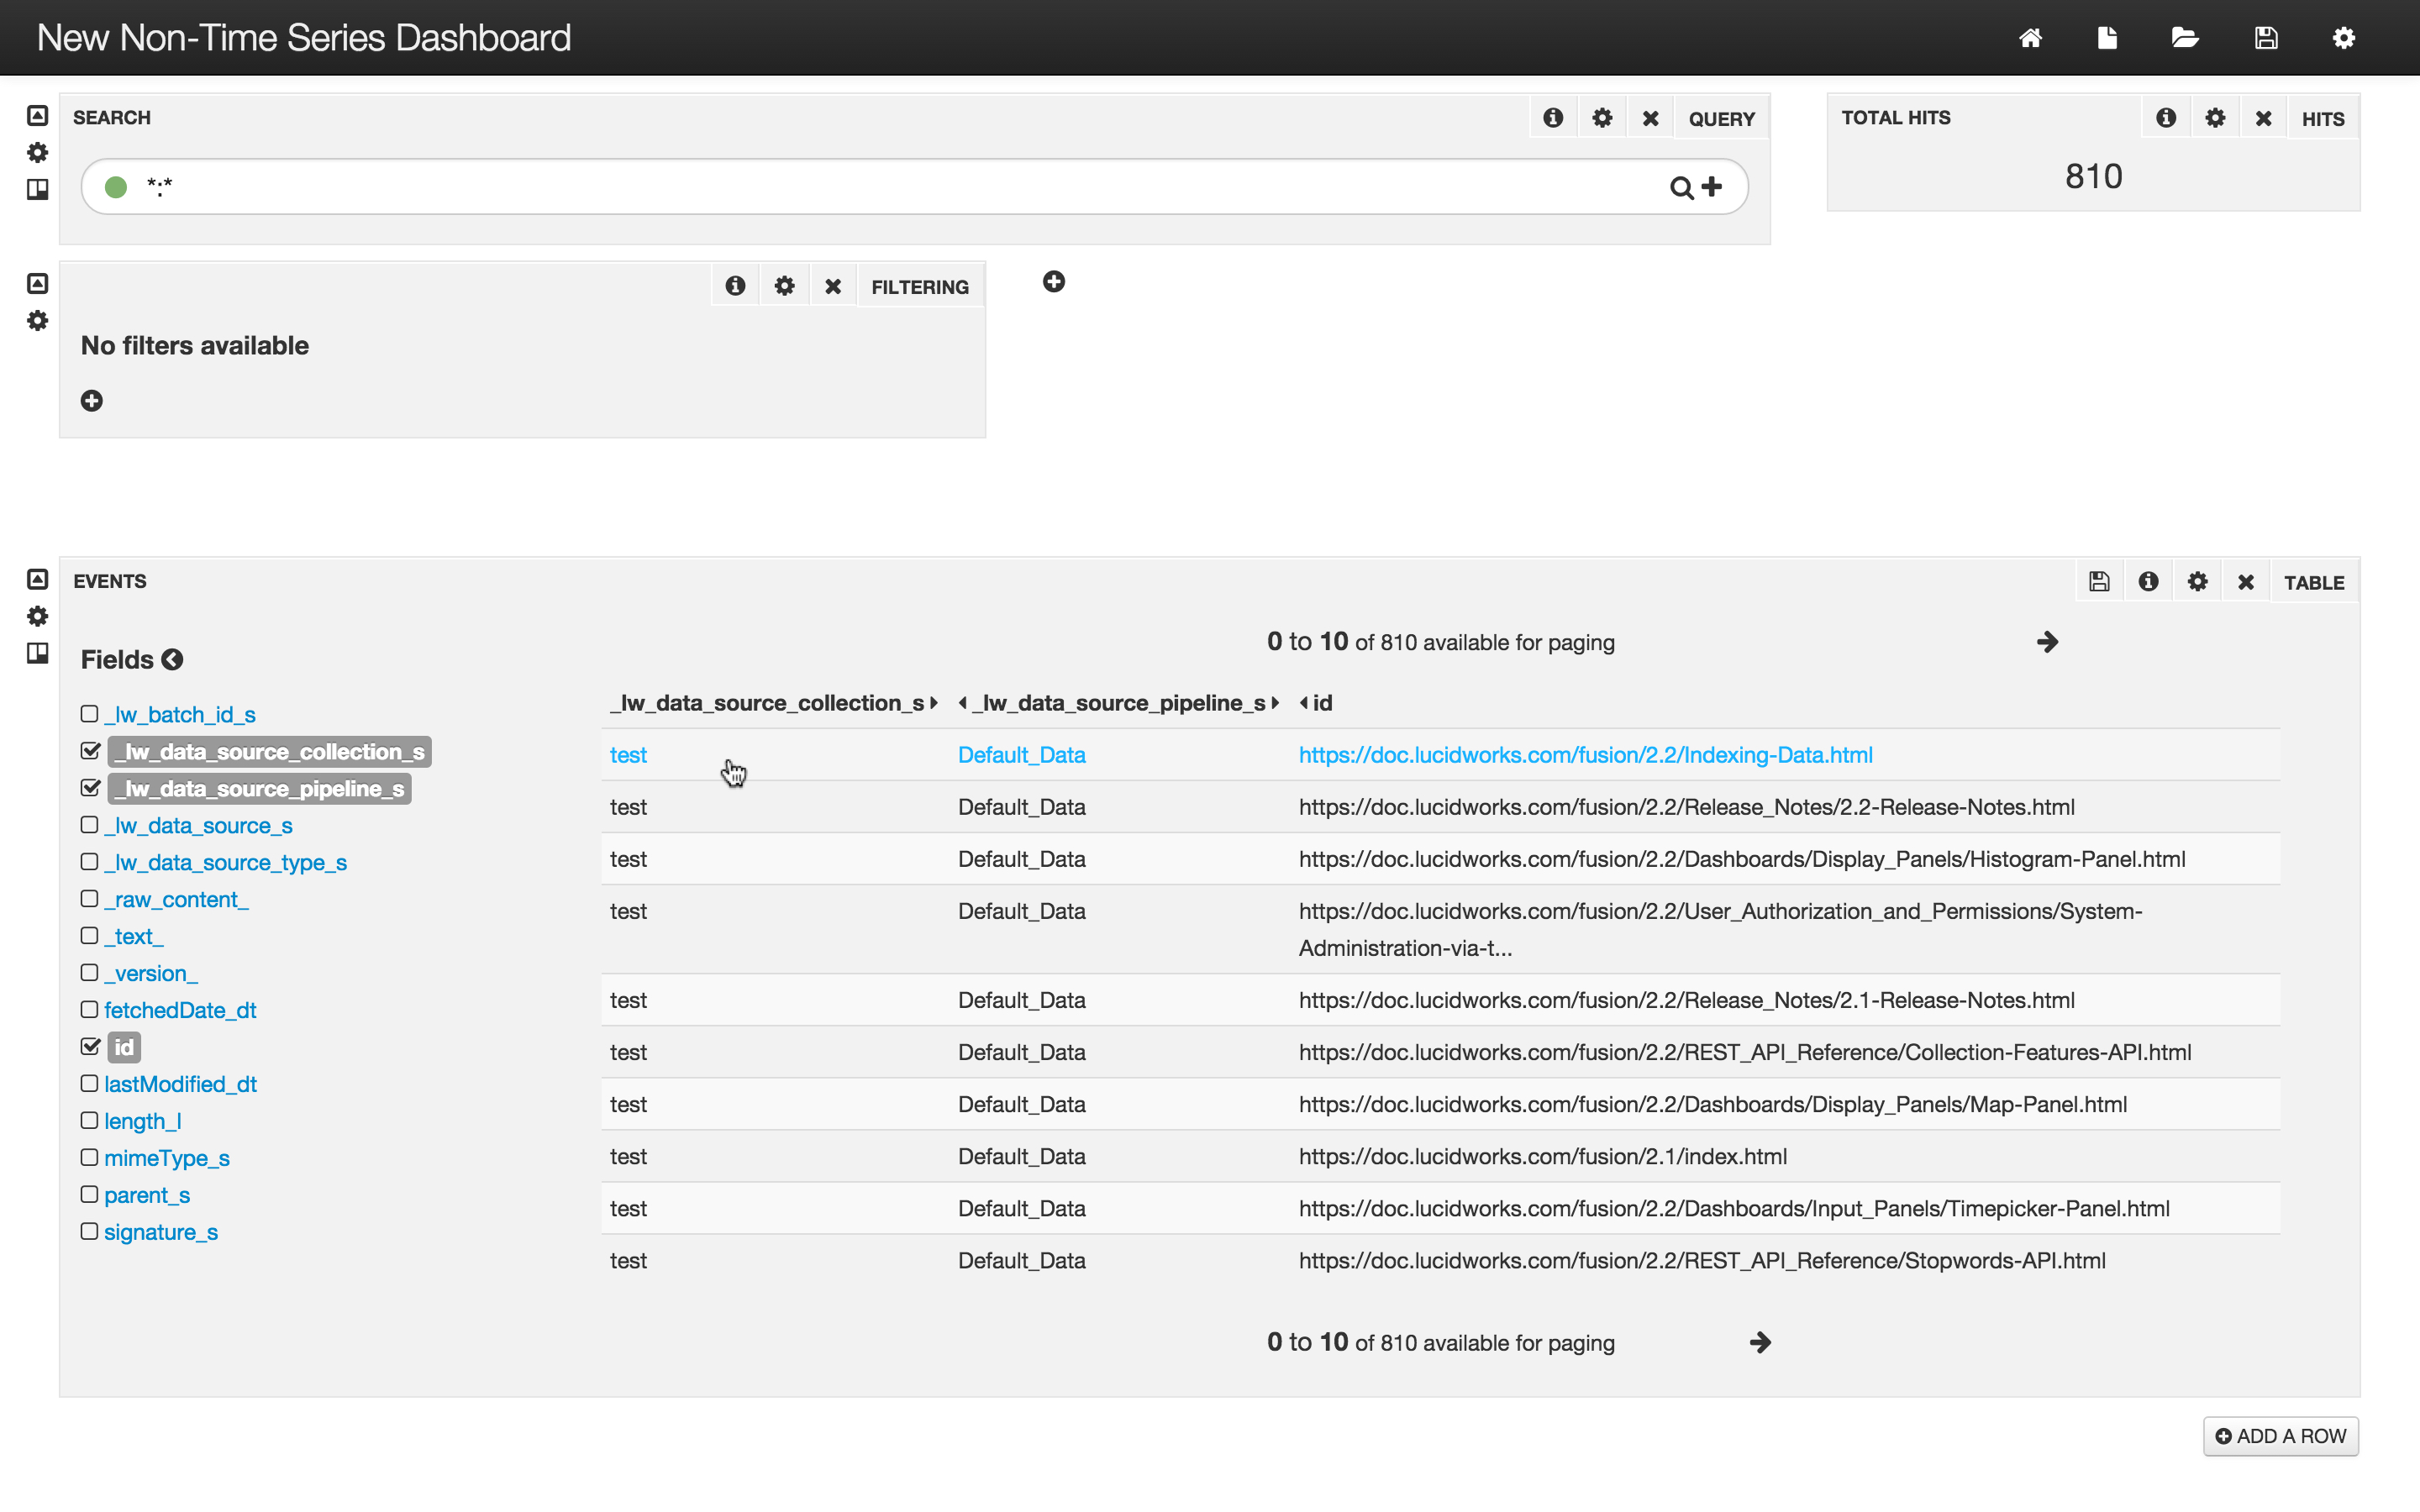
Attempts to save this dashboard back to Solr fail because this role grants read-only access.
Authentication and Session Cookies
When Fusion receives a login request, it authenticates the user by fetching their encrypted password from ZooKeeper and doing a password-hash comparison. Because this is computationally expensive, upon successful authentication, the Fusion UI automatically creates a session cookie which contains the unique user id. This cookie is used the rest of the browser session, although it will expire after 45 minutes of inactivity.
All requests to the Fusion REST-API require either a username and password pair or the session cookie which contains the unique user id. For applications which send requests to the Fusion REST-API, the Fusion UI service endpoint “api/session” can be used to generate this cookie via a POST request whose body consists of a JSON object which contains the username, password information. When you’re running Fusion over SSL, these passwords are securely encrypted as they go across the wire. (If you’re not running Fusion over SSL, please see the previous post in this series to remedy this.)
To see how to generate and use session cookies, we use the the curl command-line tool. The command to generate a session cookie for the admin user with password “password123” is:
curl
 -c cookie -i -X POST -H "Content-type:application/json" -d @- -k
 https://localhost:8764/api/session
<<EOF
 { "username" : "admin" , "password" : "password123" }
EOF
The curl command takes any number of specialized arguments, followed by the URL of the request endpoint. For those of you that don’t speak fluent curl, here is what each part of the above incantation does:
-c: filename of cookies file. If it exists, cookies are added to it. You can use-c -which writes to the terminal window (std out).-i: include the HTTP-header in the output. Used here to see the cookie returned with the response.-X: request method, in this casePOST-H: request header. Theapi/sessionendpoint requiresContent-type:application/json.-d: Pass POST body as part of the command-line request. To get ready the body from a file, use the syntax-d @<filename>. The argument-d @-reads the data from stdin.-k: insecure mode – this turns off verification of the server’s SSL certificate. This is necessary for this example because the server is using a self-signed certificate.- <URL> : request URL –
https://localhost:8764/api/session, since Fusion is running locally and is configured for SSL.
The final lines contains the POST body data which is the JSON object containing the username, password pair. The argument -d @- directs curl to read the data from stdin. The shell heredoc format takes all text between the line “<<EOF” and the terminating line “EOF” and sends it to stdin. This lets you specify all arguments, including the request URL, before typing all all the POST data. If, like me, you sometimes forget to include the URL after all the data, use heredoc.
The header output shows the cookie information:
HTTP/1.1 201 Created
Set-Cookie: id=996e4adf-bd04-4058-a926-8ea8ca08c05a;Secure;HttpOnly;Path=/api
Content-Length: 0
Server: Jetty(9.2.11.v20150529)
The cookie information in the header matches the information in the cookie file:
> cat cookie

# Netscape HTTP Cookie File
# http://curl.haxx.se/docs/http-cookies.html
# This file was generated by libcurl! Edit at your own risk.

#HttpOnly_localhost     FALSE   /api    TRUE    0       id      996e4adf-bd04-4058-a926-8ea8ca08c05a
Once the session cookie file has been created, it can be sent along in all subsequent requests to the REST-API. For the curl command-line client, the -b flag is used to send the contents of the cookie file to the server along with the request.
The following command sends a GET request to the Fusion REST-API Collections service to check the status of the “system_metrics” collection. The -b flag sends in a freshly generated session cookie. As before, the -k flag is required since the SSL Fusion is using a self-signed certificate:
> curl -b cookie -i -k https://localhost:8764/api/apollo/collections/system_metrics

HTTP/1.1 200 OK
Content-Type: application/json; charset=utf-8
Content-Encoding: gzip
Vary: Accept-Encoding, User-Agent
Content-Length: 278
Server: Jetty(9.2.11.v20150529)

{
  "id" : "system_metrics",
  "createdAt" : "2016-03-04T23:29:47.779Z",
  "searchClusterId" : "default",
  "commitWithin" : 10000,
  "solrParams" : {
    "name" : "system_metrics",
    "numShards" : 1,
    "replicationFactor" : 1
  },
  "type" : "METRICS",
  "metadata" : { }
}
If the session cookie has expired, the system returns a 401 Unauthorized code:
> curl -b cookie -i -k https://localhost:8764/api/apollo/collections/system_metrics

HTTP/1.1 401 Unauthorized
Content-Type: application/json; charset=utf-8
Content-Length: 31
Server: Jetty(9.2.11.v20150529)

{"code":"session-idle-timeout"}
Discussion
Fusion provides security at the data transport layer via HTTPS and SSL. Secure Fusion: SSL Configuration explains how this works and shows you how to configure Fusion for SSL. This ensures that data sent to and from Fusion is securely encrypted which prevents intermediate servers from accessing your data.
In this post, we’ve seen how Fusion’s authentication and permissions work in tandem to protect your data from unauthorized access, and how to manage user accounts and permissions directly in Fusion. As a practical example, we show how to configure Fusion to give a user read-only access to Fusion’s data analytics Dashboards for a specific collection. As a bonus, we show how manage session cookies for speedy authentication.
Upcoming blog posts will show how Fusion can be configured to get the user names, passwords, and group memberships of the security mechanism of the domain in which Fusion is being run, thus ensuring the data ingested into Fusion retains the same levels of access and protection as it has in the source repository.
LEARN MORE
Contact us today to learn how Lucidworks can help your team create powerful search and discovery applications for your customers and employees.