Secure Fusion: SSL Configuration
There is an updated version of this tutorial available in the Fusion documentation.
This is the first in a series of articles on securing your data in Lucidworks Fusion.
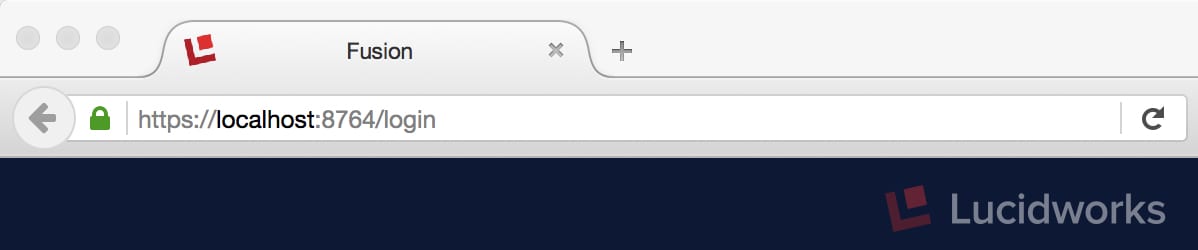
The first step in securing your data is to make sure that all data sent to and from Fusion is encrypted by using HTTPS and SSL instead of regular HTTP. Because this encryption happens at the transport layer, not the application layer, when Fusion is configured for HTTPS and SSL, the only noticeable change is the lock icon in the browser location display which indicates that the HTTPS protocol is being used:
SSL encryption keeps your data private as it travels across the wire, preventing intermediate servers from eavesdropping on your conversation, or worse. SSL certificates are used to verify the identity of of a server in order to prevent “man-in-the-middle” attacks. Should you always configure Fusion to use SSL? If Fusion is on a secure network and doesn’t accept requests from external servers, no. Otherwise, Yes!
To configure Fusion to use SSL, you must configure the Fusion UI service for SSL. All requests to Fusion go through the Fusion UI service. This includes requests to the Fusion REST-API services, because the Fusion UI service contains the Fusion authentication proxy which controls user access permissions. Because the Fusion UI service (currently) uses the Jetty server, most of this post is about configuring the Jetty server for SSL. The Eclipse website provides a good overview and detailed instructions on configuring Jetty for SSL: http://www.eclipse.org/jetty/documentation/current/configuring-ssl.html
There are two conceptual pieces to the configuration puzzle:
- SSL keypairs, certificates, and the JSEE keystore
- Fusion UI service configuration
Puzzle Piece One: SSL Keypairs, Certificates, and the JSEE Keystore
In order to get started, you need a JSSE keystore for your application which contains an SSL keypair and a signed SSL certificate. The SSL protocol uses a keypair consisting of a publicly shared key and a private key which is never shared. The public key is part of the SSL certificate. The server’s keystore contains both the keypair and the certificate.
At the start of the session, the client and server exchange series a of messages according to the SSL Handshake protocol. The handshake process generates a shared random symmetric encryption key which is used for all messages exchanged subsequent to the handshake. During the initial message exchange, the server sends its SSL certificate containing its public key to the client. The next two turns of the conversation establish the shared symmetric key. Because of clever properties of the keypair, the client uses the public key to generate a message which can only be decrypted by the holder of the private key, thus proving the authenticity of the server. Since this process is computationally expensive, it is carried out only once, during the handshake; after that, the shared symmetric key is used with an agreed-on encryption algorithm, details of which are beyond the scope of this blog post. A nice overview of this process, with schematic, is available from this IBM docset. For the truly curious, I recommend reading this writeup of the math behind the handshake for non-mathematicians.
In addition to the public key, a certificate contains the web site name, contact email address, company information. Certificates are very boring to look at:
  Bag Attributes
      friendlyName: localhost
      localKeyID: 54 69 6D 65 20 31 34 35 35 38 34 30 33 35 36 37 37 35
  Key Attributes: <No Attributes>
  -----BEGIN RSA PRIVATE KEY-----
  Proc-Type: 4,ENCRYPTED
  DEK-Info: DES-EDE3-CBC,E2BCF2C42A11885A

  tOguzLTOGTZUaCdW3XzoP4xDPZACEayuncv0HVtNRR3PZ5uQNUzZaNX0OgbSUh5/
  /w6Fo7yENJdlTgMC4XafMRN+rTCfVj3XBsnOvQVj7hLiDq1K26XpvD79Uvb2B4QU
    ...  (omitting many similar lines) ...
  x3LI5ApQ2G2Oo3OnY5TZ+EYuHgWSICBZApViaNlZ4ErxXp1Xfj4iFtfi50hcChco
  poL9RdLpOx/CyLuQZZn5cjprIjDA3FcvmjBfOlmE+xm+eNMIKpS54w==
  -----END RSA PRIVATE KEY-----
  Bag Attributes
      friendlyName: localhost
      localKeyID: 54 69 6D 65 20 31 34 35 35 38 34 30 33 35 36 37 37 35
  subject=/C=NA/ST=NA/L=Springfield/O=some org/OU=some org unit/CN=firstname lastname
  issuer=/C=NA/ST=NA/L=Springfield/O=some org/OU=some org unit/CN=firstname lastname
  -----BEGIN CERTIFICATE-----
  MIIDqzCCApOgAwIBAgIEIwsEjjANBgkqhkiG9w0BAQsFADB4MQswCQYDVQQGEwJO
  QTELMAkGA1UECBMCTkExFDASBgNVBAcTC1NwcmluZ2ZpZWxkMREwDwYDVQQKEwhz
    ...  (omitting many similar lines) ...
  fALku9VkH3j7PidVR5SJeFzwjvS+KvjpmxAsPxyrZyZwp2qMEmR6NPjLjYjE+i4S
  04UG7yrKTm9CuElddLFAnuwaNAuifbbZ6P3BR3rFaA==
  -----END CERTIFICATE-----
Certificates are signed by a CA (Certificate Authority), either a root CA or an intermediate CA. Intermediate CAs provide enhanced security, so these should be used to generate the end user certificate.
You need to get a signed certificate and an SSL keypair from your sys admin and put it into the keystore used by the Fusion UI Jetty server. In a production environment, you will need to set up your keystore file in a secure location with the appropriate permissions and then configure the Fusion UI Jetty server to use this keystore. If you don’t have a signed SSL certificate, you can get a keystore file which contains an self-signed certificate suitable for development and demos by running the Jetty start.jar utility, details in the next section.
The Java keytool utility which is part of the JDK can be used to store the server certificate and private key in the keystore. There are several file formats used to bundle together the private key and the signed certificate. The most commonly used formats are PKCS12 and PEM. PKCS12 files usually have filename extension “.p12” or “.pfx” and PEM files usually have filename extension “.pem”. In a Windows environment, you will most likely have a “.pfx” file which contains both the private key and the signed certificate and can be uploaded into the keystore directly (see example below). In a *nix environment, if you have a bundle of certification files and a keypair file, you will have to use the openssl tool to create a PKCS12 file which can then be uploaded into the keystore via the keytool. Signed certificate files have suffix “.crt” and private key files have suffix “.key”, however you should always check to see whether these are binary files or if the contents are ascii, which are most likely already in the PEM format shown above.
The following example uses the Java keytool utility to create a new keystore named “my.keystore.jks” from the private key and signed certificate bundle “my.keystore.p12” which is in pkcs12 format. The keytool prompts for a keystore passwords for both the source and destination keystore files:
> keytool -importkeystore
> -srckeystore my.keystore.p12
> -srcstoretype pkcs12
> -destkeystore my.keystore2.jks
> -deststoretype JKS

Enter destination keystore password:
Re-enter new password:
Enter source keystore password:
Entry for alias localhost successfully imported.
Import command completed:  1 entries successfully imported, 0 entries failed or cancelled
To check your work, you can use the keytool command “-list” option:
> keytool -list -keystore my.keystore2.jks

Enter keystore password:

Keystore type: JKS
Keystore provider: SUN

Your keystore contains 1 entry

localhost, Feb 18, 2016, PrivateKeyEntry,
Certificate fingerprint (SHA1): 63:1E:56:59:65:3F:83:2D:49:F1:AC:87:15:04:1A:E4:0C:E1:26:62
Puzzle Piece Two: Fusion UI Service Configuration
The Fusion UI service uses the Jetty server, which means that you must first configure the Fusion UI service Jetty server which is found in the Fusion directory apps/jetty/ui, and then change the port and protocol information in the Fusion UI service start script which is found in the Fusion directory bin.
Jetty Server Configuration
The configuration files for Fusion services which run on the Jetty server are found in the Fusion distribution directory apps/jetty. The directory apps/jetty/ui contains the Jetty server configured to run the Fusion UI service for the default Fusion deployment. The directory apps/jetty/home contains the full Jetty distribution.
The following information is taken from the http://www.eclipse.org/jetty/documentation/current/quickstart-running-jetty.html#quickstart-starting-https documentation.
The full Jetty distribution home directory contains a file “start.jar” which is used to configure the Jetty server. The command line argument “–add-to-startd” is used to add additional modules to the server. Specifying “–add-to-startd=https” has the effect of adding ini files to run an ssl connection that supports the HTTPS protocol as follows:
- creates start.d/ssl.ini that configures an SSL connector (eg port, keystore etc.) by adding etc/jetty-ssl.xml and etc/jetty-ssl-context.xml to the effective command line.
- creates start.d/https.ini that configures the HTTPS protocol on the SSL connector by adding etc/jetty-https.xml to the effective command line.
- checks for the existence of a etc/keystore file and if not present, downloads a demonstration keystore file.
Step 1: run the start.jar utility
To configure the Fusion UI service jetty server for SSL and HTTPS, From the directory apps/jetty/ui, run the following command:
> java -jar ../home/start.jar --add-to-startd=https
Unless there is already a file called “keystore” present, this utility will install a local keystore file that contains a self-signed certificate and corresponding keypair which can be used for development and demo purposes. In addition, it adds files “http.ini” and “ssl.ini” to the local “start.d” subdirectory:
> ls start.d
http.ini        https.ini       ssl.ini
This set of “.ini” files determines the Jetty control the configuration of the server. These files are Java properties files that are used to configure the http, https, and ssl modules. In the default Fusion distribution, the directory apps/jetty/ui/start.d only contains the file “http.ini”, so the Fusion UI service runs over HTTP. The HTTPS module requires the SSL module, so “.ini” files for both are added.
Step 2: edit file start.d/ssl.ini
The “.ini” files are Java property files. As installed, the “ssl.ini” file is configured to use the demonstration keystore file. This is convenient if you are just trying to do a local install for development purposes, and is especially convenient if you don’t yet have the requisite certification bundles and keystore – at this point, your configuration is complete. But if you have a real keystore, you’ll need to edit all keystore-related properties in the “ssl.ini” file:
### SSL Keystore Configuration

## Setup a demonstration keystore and truststore
jetty.keystore=etc/keystore
jetty.truststore=etc/keystore

## Set the demonstration passwords.
## Note that OBF passwords are not secure, just protected from casual observation
## See http://www.eclipse.org/jetty/documentation/current/configuring-security-secure-passwords.html
jetty.keystore.password=OBF:1vny1zlo1x8e1vnw1vn61x8g1zlu1vn4
jetty.keymanager.password=OBF:1u2u1wml1z7s1z7a1wnl1u2g
jetty.truststore.password=OBF:1vny1zlo1x8e1vnw1vn61x8g1zlu1vn4
Note the obfuscated passwords – use the tool mentioned above: http://www.eclipse.org/jetty/documentation/current/configuring-security-secure-passwords.html to obfuscate, checksum, or encrypt passwords.
Step 3 (optional): disable use of HTTP
You can entirely disable use of HTTP by removing the HTTP connector from the jetty startup configuration:
> rm start.d/http.ini
Fusion UI Service Configuration
The Fusion UI service startup script is found in the Fusion distribution bin directory, in files bin/ui and bin/ui.cmd, for *nix and Windows respectively. It sets a series of environment variables and then starts the Jetty server. The arguments to exec command to start the Jetty server require one change:
change the command line argument from “jetty.port=$HTTP_PORT” to “https.port=$HTTP_PORT”
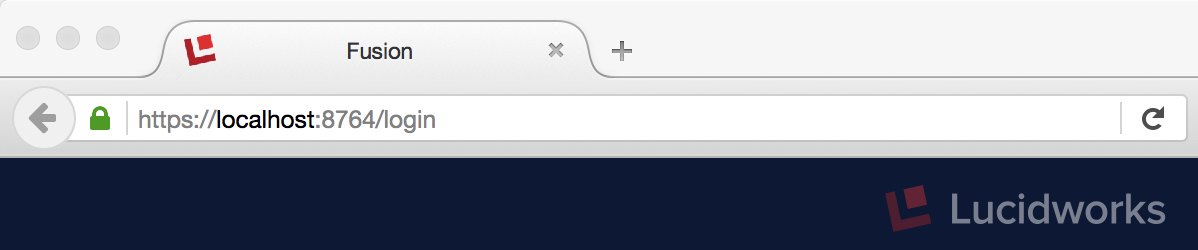
The UI service startup script is called from the main start script bin/fusion. Once Fusion startup is complete, you should be able to access it securely in the browser via the HTTPS protocol (see initial screenshot above). If the server is using a self-signed certificate, both Firefox and Chrome browsers will issue warnings requiring you to acknowledge that you really want to trust this server. The Chrome browser also flags sites using a self-signed certificate by displaying a warning icon instead of the secure lock icon:

Discussion
SSL is the seatbelt required for cruising the information highway: before sending your data to some remote server, buckle up! Future releases of Fusion will provide even more security in the form of “SSL everywhere”, meaning that it will be possible to configure Fusion’s services so that all traffic between the components will be encrypted, keeping your data safe from internal prying eyes.
SSL provides data security at the transport layer. Future posts in this series will cover:
- Security at the application layer, using Fusion’s fine-grained permissions
- Security at the document layer with MS Sharepoint security-trimming
- Fusion and Kerberos
LEARN MORE
Contact us today to learn how Lucidworks can help your team create powerful search and discovery applications for your customers and employees.